EduConnect In-App Activities Manual

Complete In-App Activities

Step-by-step reference for subject management, teacher management, student management, attendance, parent communication, calendar holidays and the upcoming activities timeline inside the EduConnect app.

1

Open batch Dashboard

Open the selected batch dashboard to access the available in-app activities.
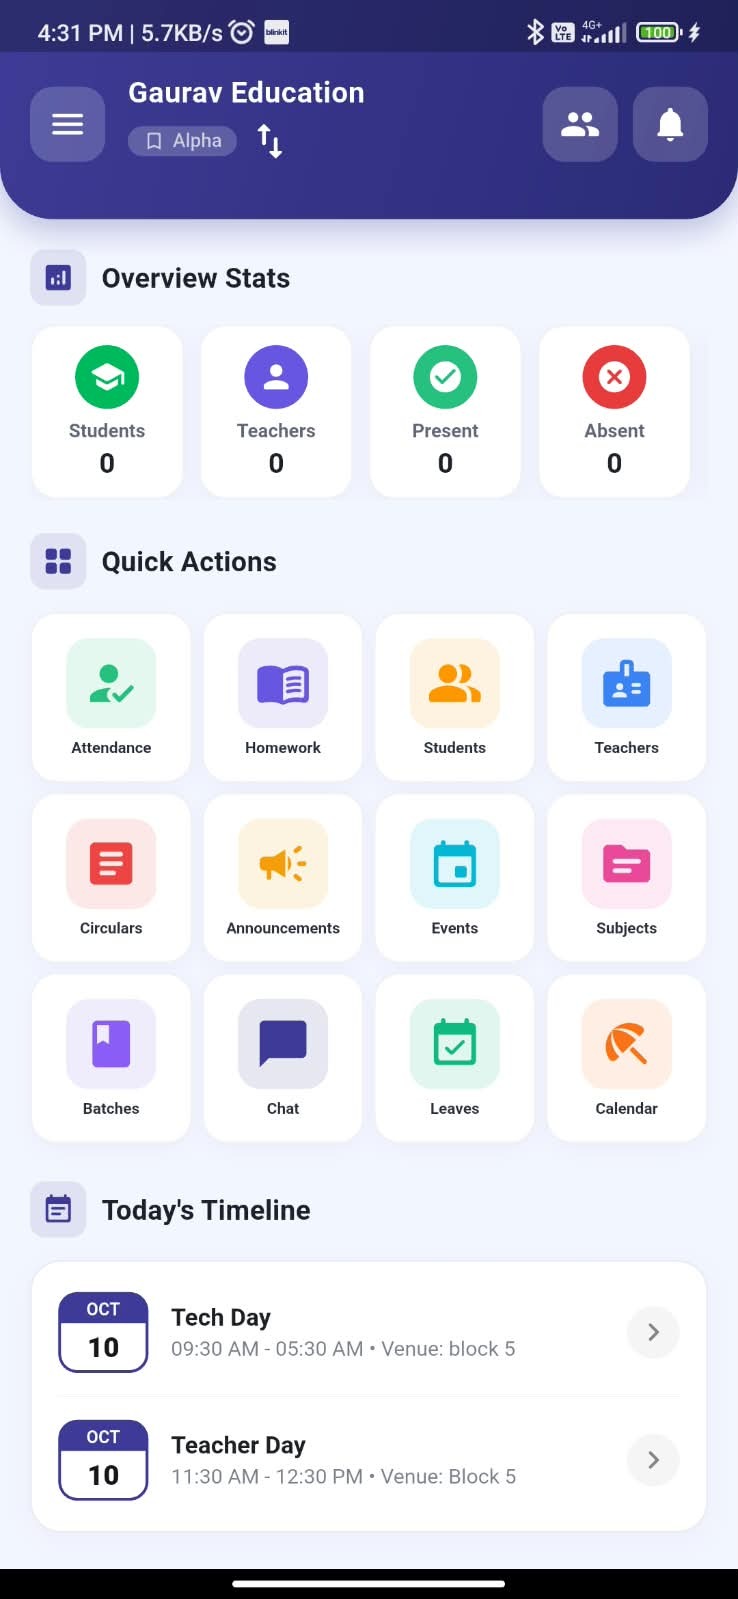
Image 21.jpg   |   In-App Activity Step 1
EduConnect in-app activity image 21 - Open batch Dashboard
2

Open Subject Details

Open the Subjects area from the batch dashboard.
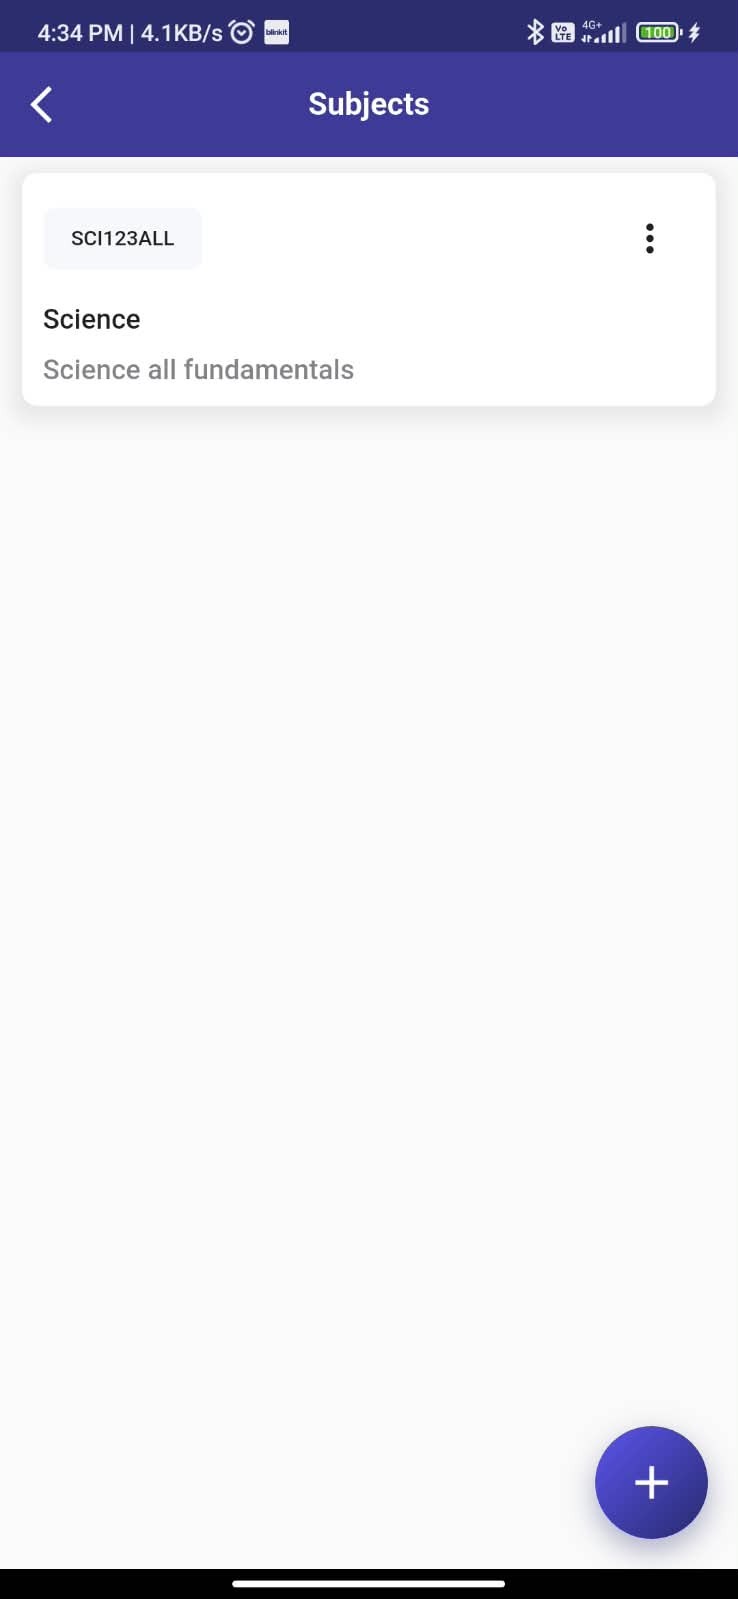
Image 25.jpg   |   In-App Activity Step 2
EduConnect in-app activity image 25 - Open Subject Details
3

Add Subject

Tap the plus button to start adding a new subject.
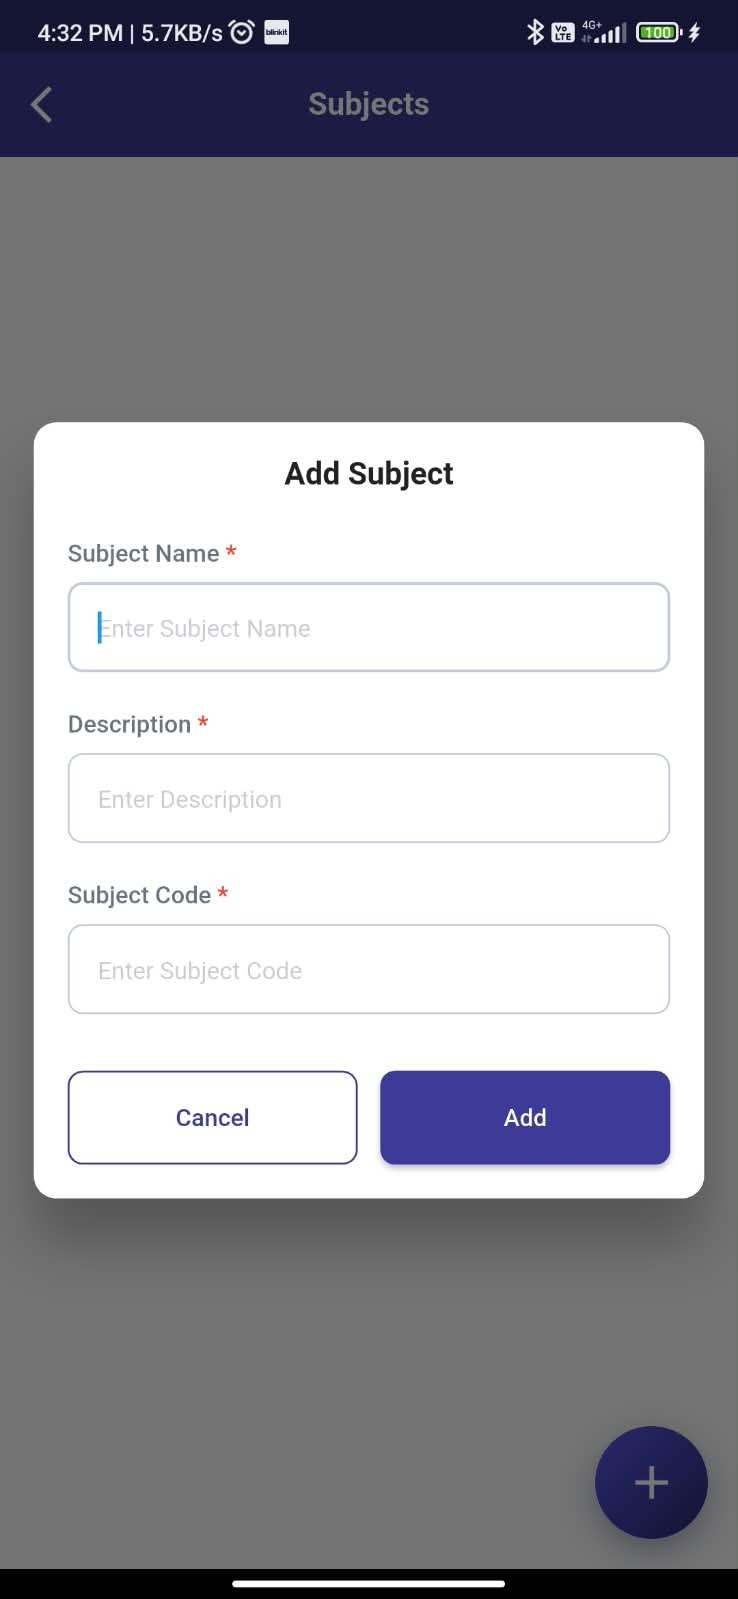
Image 23.jpg   |   In-App Activity Step 3
EduConnect in-app activity image 23 - Add Subject
4

Fill details for Subject

Enter the Subject Name, Description and Subject Code, then add the subject.
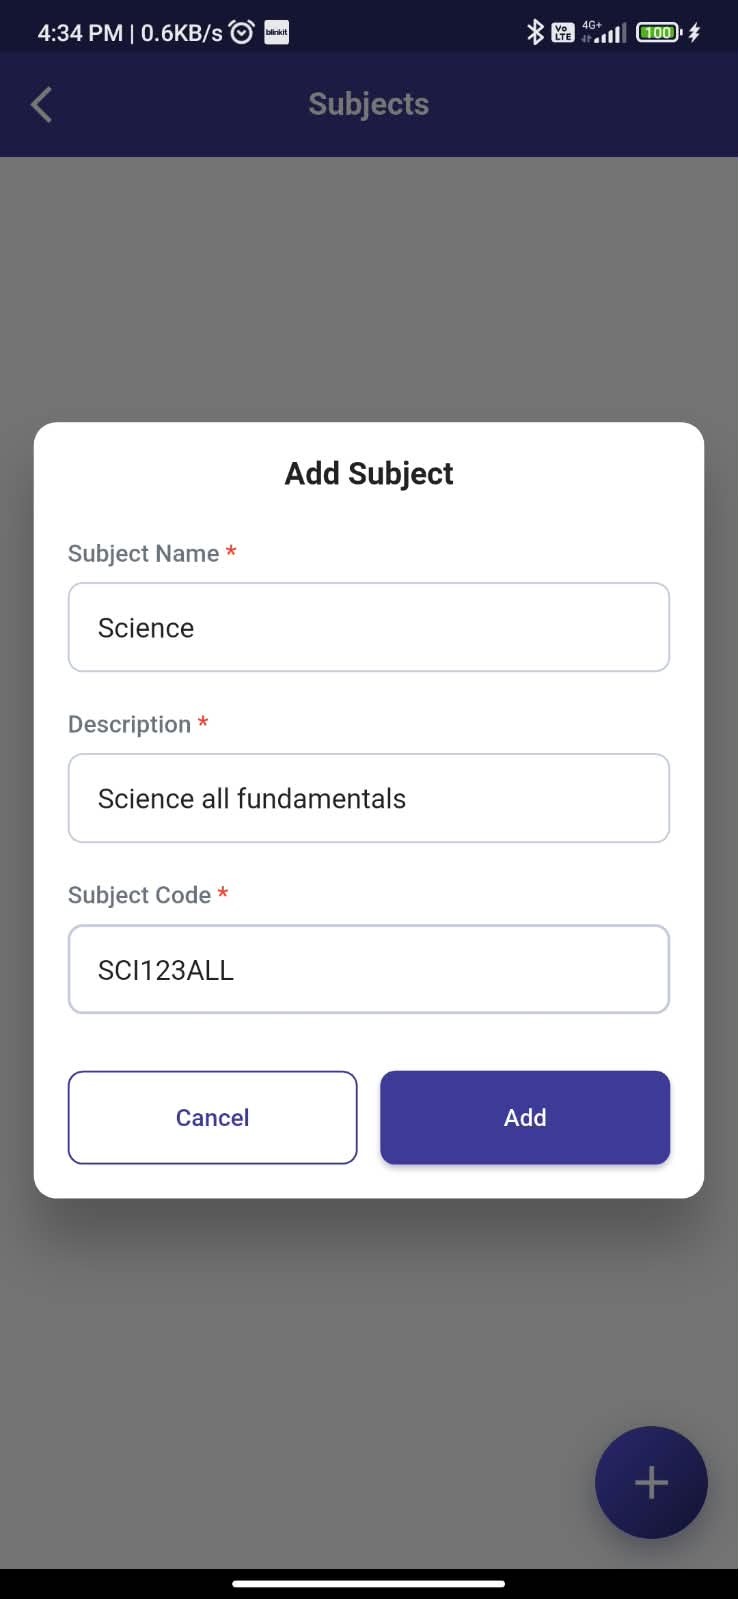
Image 24.jpg   |   In-App Activity Step 4
EduConnect in-app activity image 24 - Fill details for Subject
5

View/Update Subjects

View the subject list and use the available subject options to manage or update subjects.
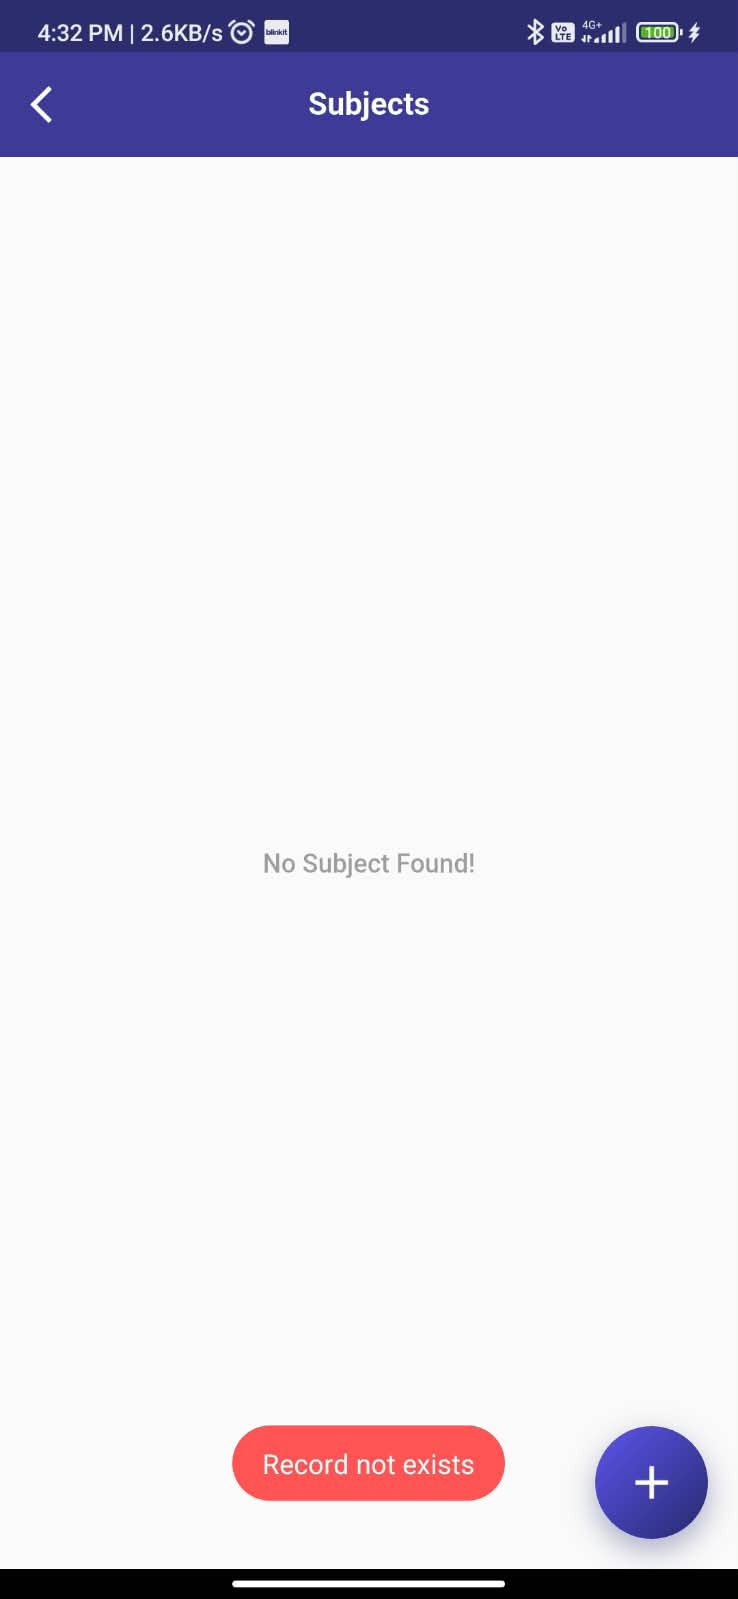
Image 22.jpg   |   In-App Activity Step 5
EduConnect in-app activity image 22 - View/Update Subjects
6

Teacher related Activities

Open the teacher area to view or manage teachers associated with the batch.
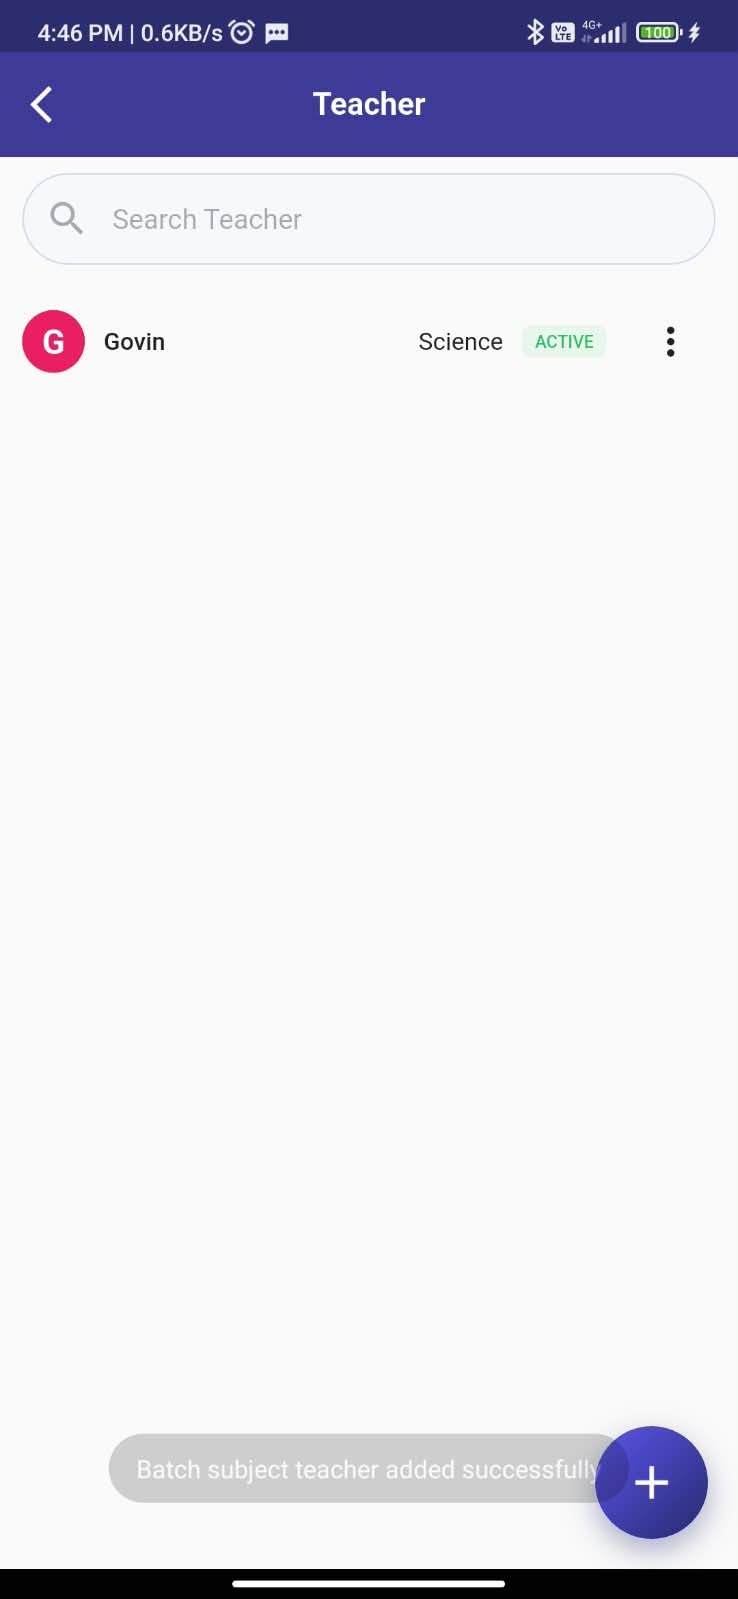
Image 29.jpg   |   In-App Activity Step 6
EduConnect in-app activity image 29 - Teacher related Activities
7

View Already Added Teachers

View teachers already associated with the selected batch.

Image 29.jpg   |   In-App Activity Step 7
EduConnect in-app activity image 29 - View Already Added Teachers
8

To Add click Plus button and Fill details

Tap the plus button, select the teacher and subject, then add the teacher association.
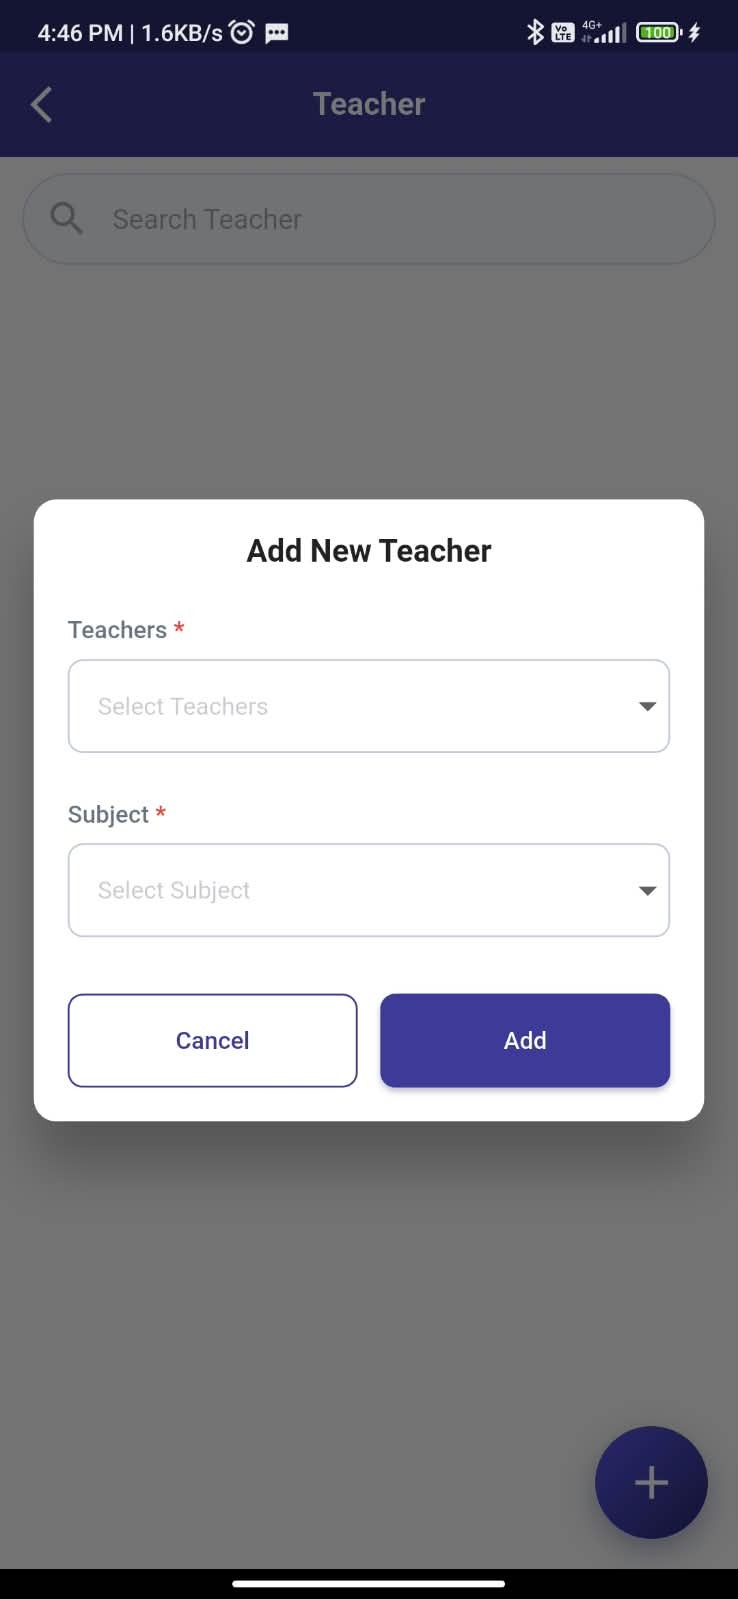
Image 28.jpg   |   In-App Activity Step 8
EduConnect in-app activity image 28 - To Add click Plus button and Fill details
9

View Added teaher details

Review the added teacher and the subject assigned to the teacher.

Image 29.jpg   |   In-App Activity Step 9
EduConnect in-app activity image 29 - View Added teaher details
10

Students details, click plus to Add New Student

Open Students and tap the plus button to begin adding a new student.
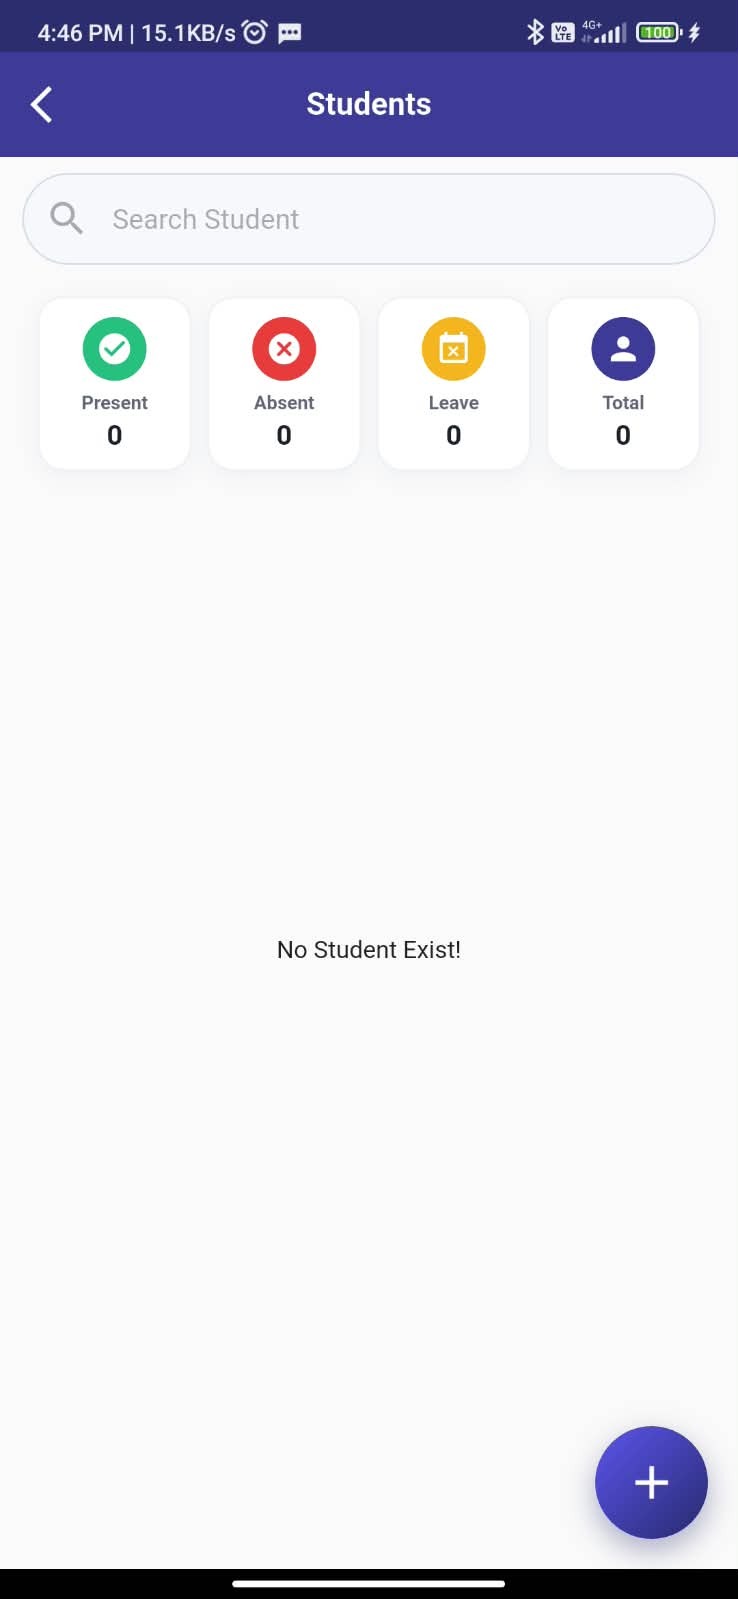
Image 30.jpg   |   In-App Activity Step 10
EduConnect in-app activity image 30 - Students details, click plus to Add New Student
11

Fill Parent number to fetch Student details

Enter the parent mobile number to search for an existing student record.
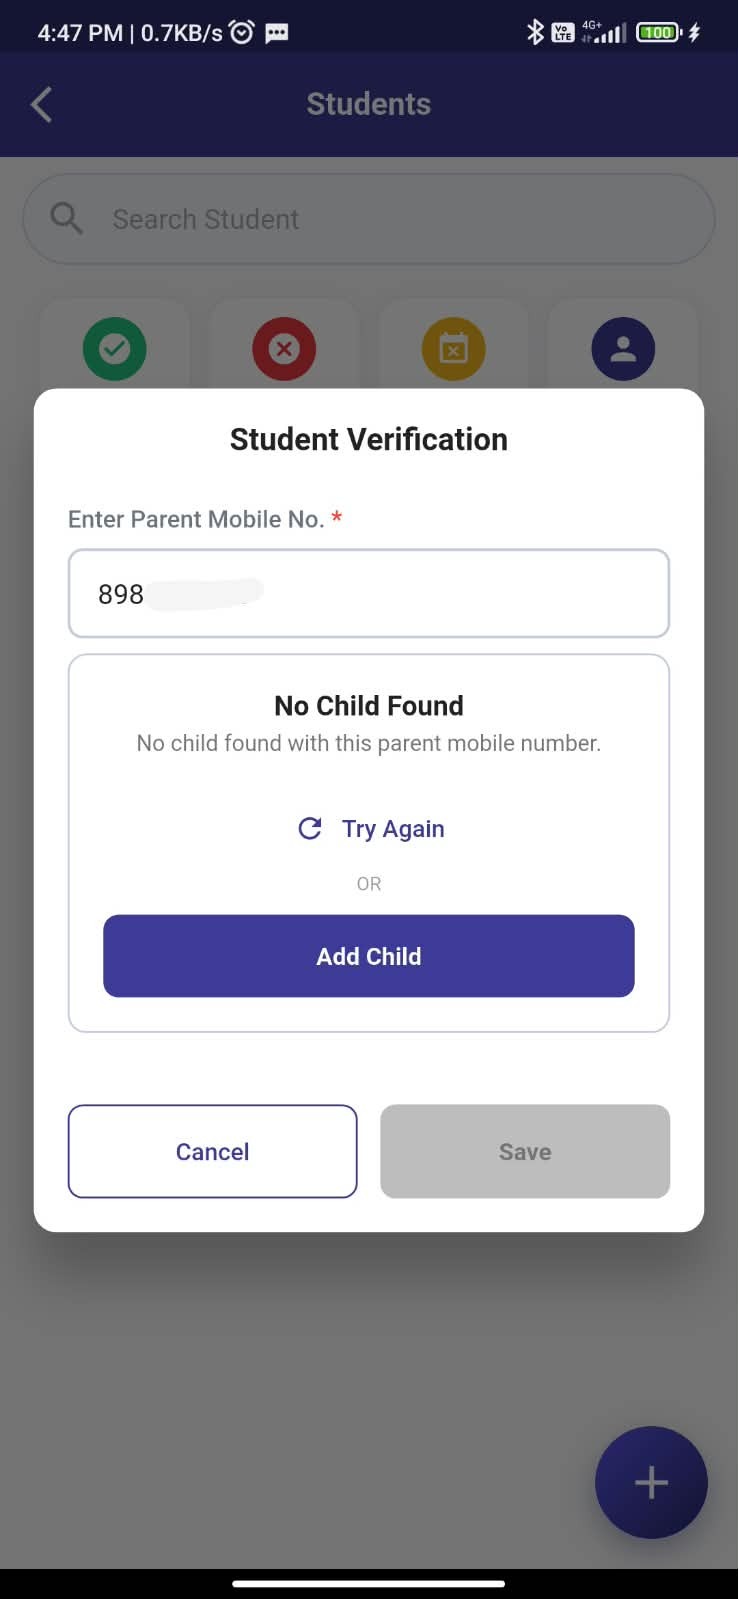
Image 31.jpg   |   In-App Activity Step 11
EduConnect in-app activity image 31 - Fill Parent number to fetch Student details
12

If no details found or new Student click Add Child, Fill required details and save

When no child is found, tap Add Child, enter the required student details and save.
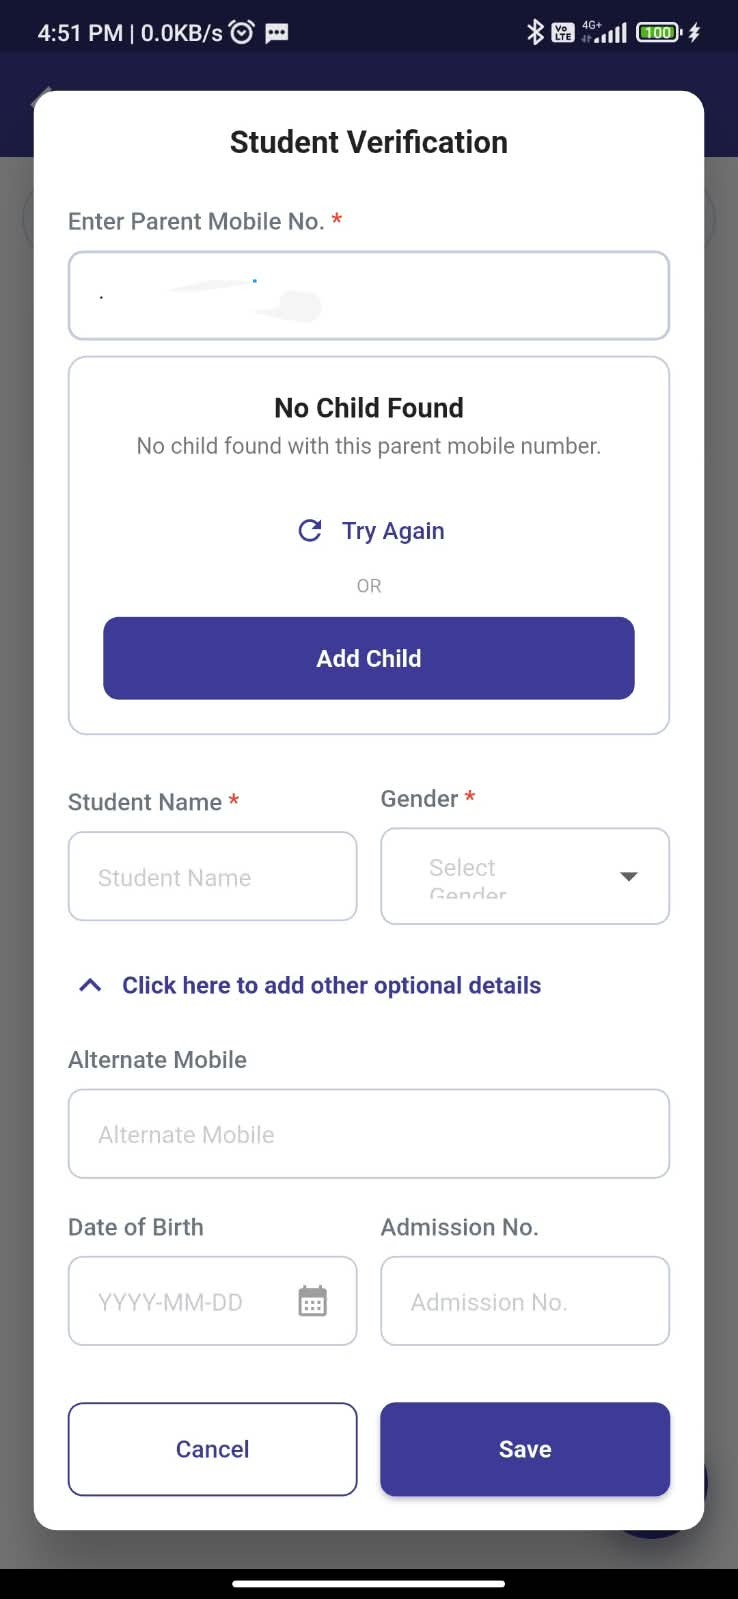
Image 34.jpg   |   In-App Activity Step 12
EduConnect in-app activity image 34 - If no details found or new Student click Add Child, Fill required details and save
13

View Added Student, Tap on it to update and mark attendance

View the student list and select a student to update details or proceed with attendance.
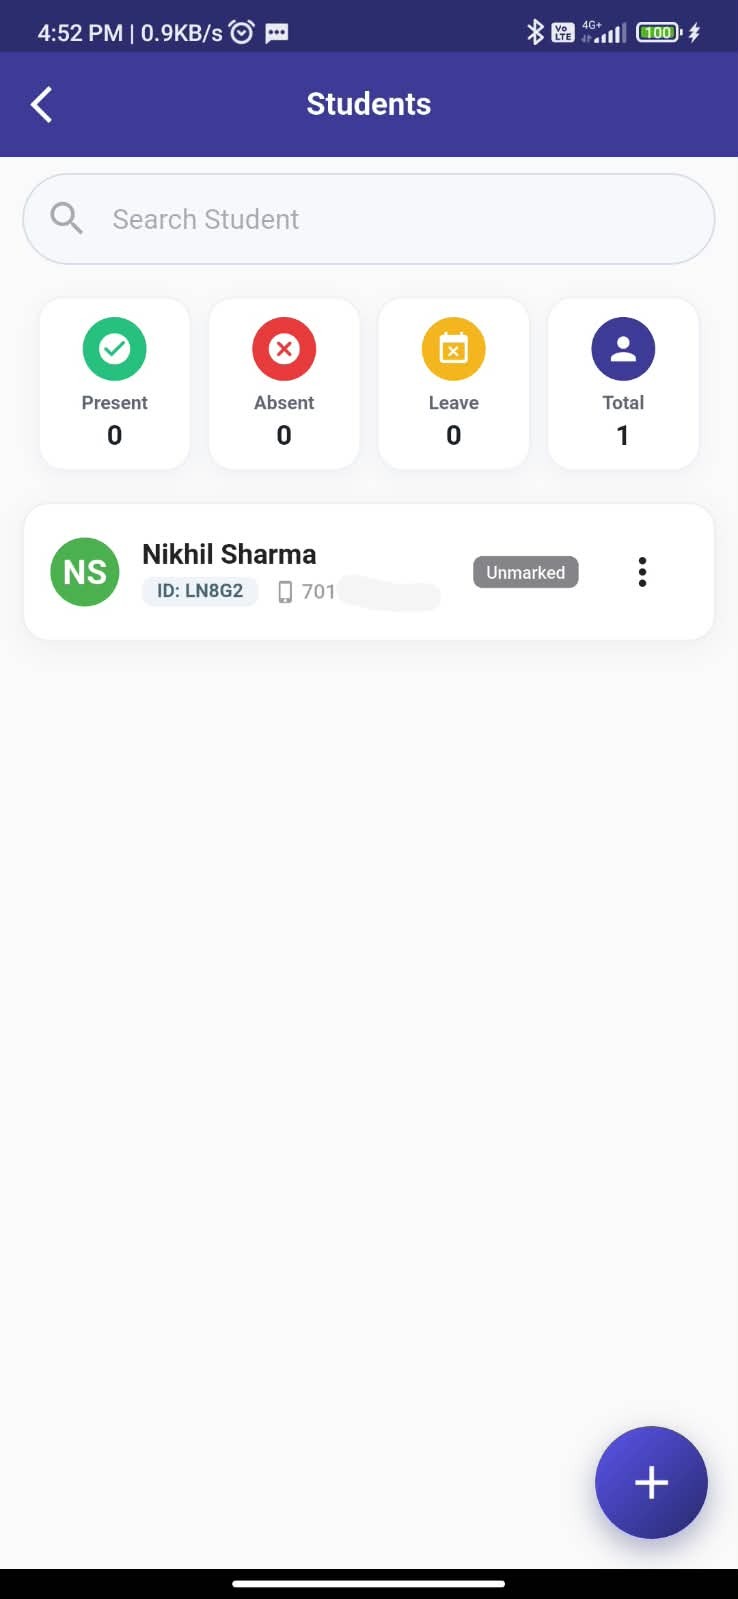
Image 32.jpg   |   In-App Activity Step 13
EduConnect in-app activity image 32 - View Added Student, Tap on it to update and mark attendance
14

Mark attendance as Present Absent, Leave and Save

Select Present, Absent or Leave for the student and save the attendance status.
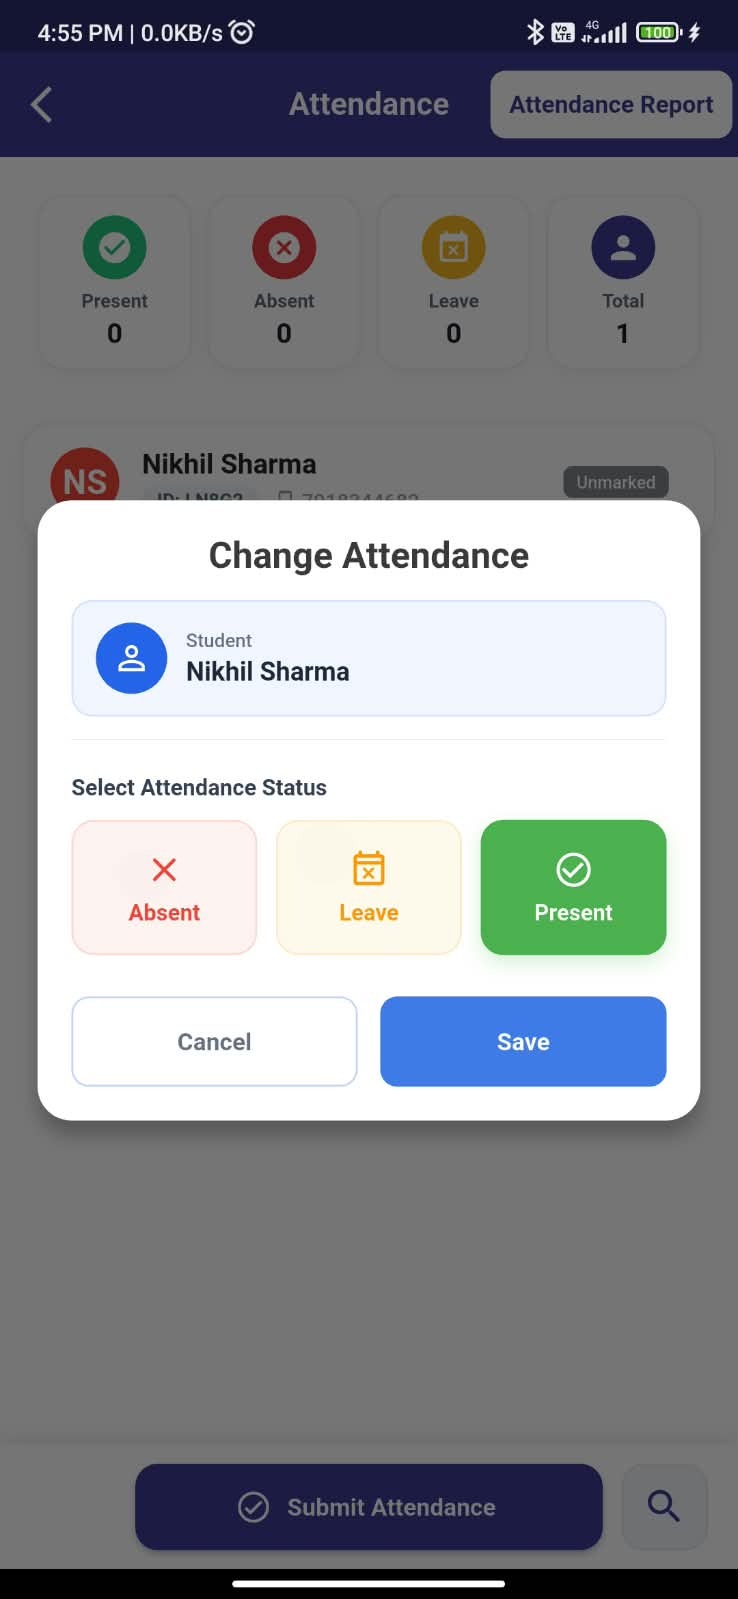
Image 36.jpg   |   In-App Activity Step 14
EduConnect in-app activity image 36 - Mark attendance as Present Absent, Leave and Save
15

To Mark all student attendance on one go

Use the attendance submission screen to mark all students Present or Absent in one action.
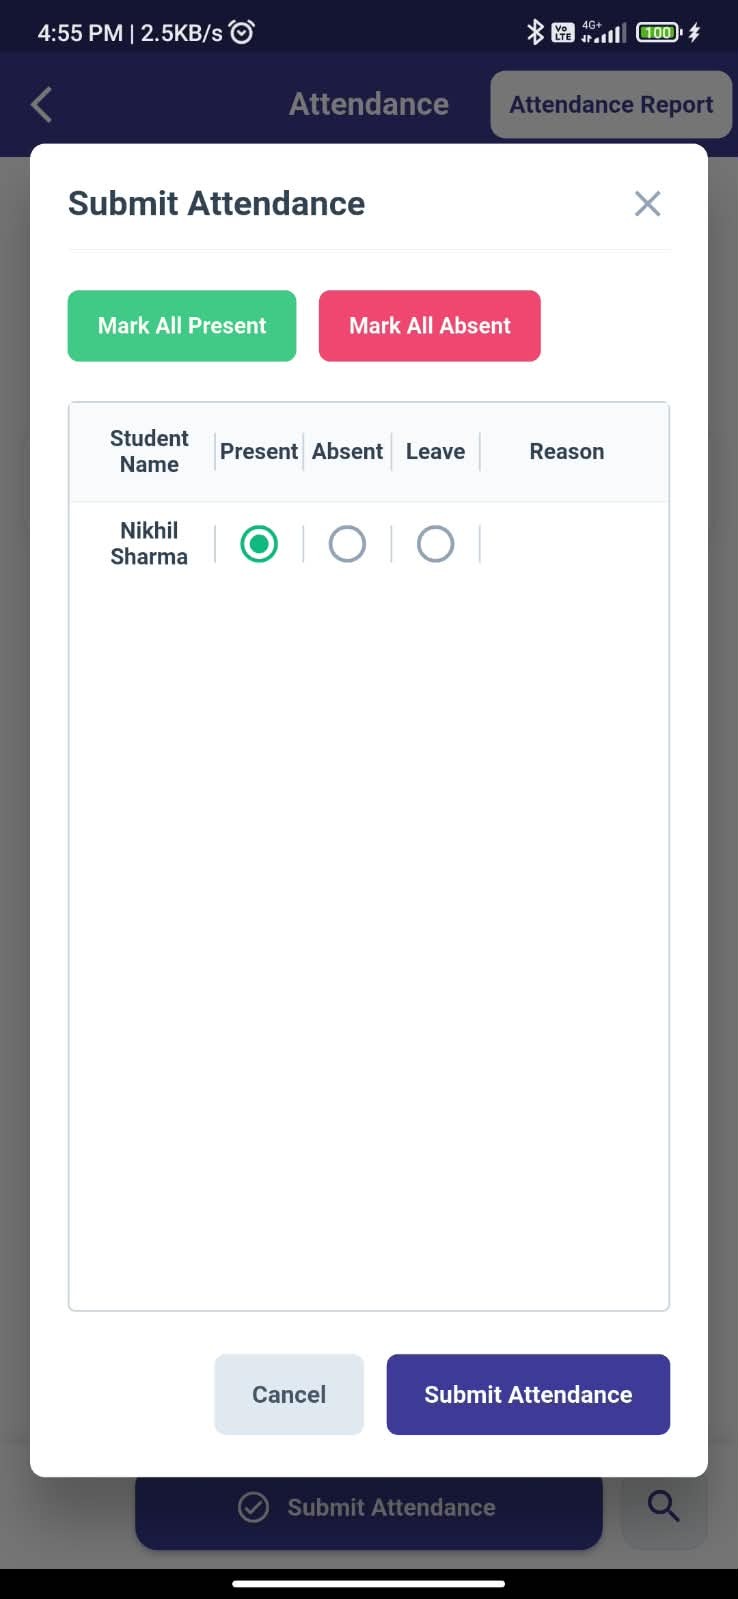
Image 37.jpg   |   In-App Activity Step 15
EduConnect in-app activity image 37 - To Mark all student attendance on one go
16

View mark Attendance

Review attendance through the attendance report and student-wise summary.
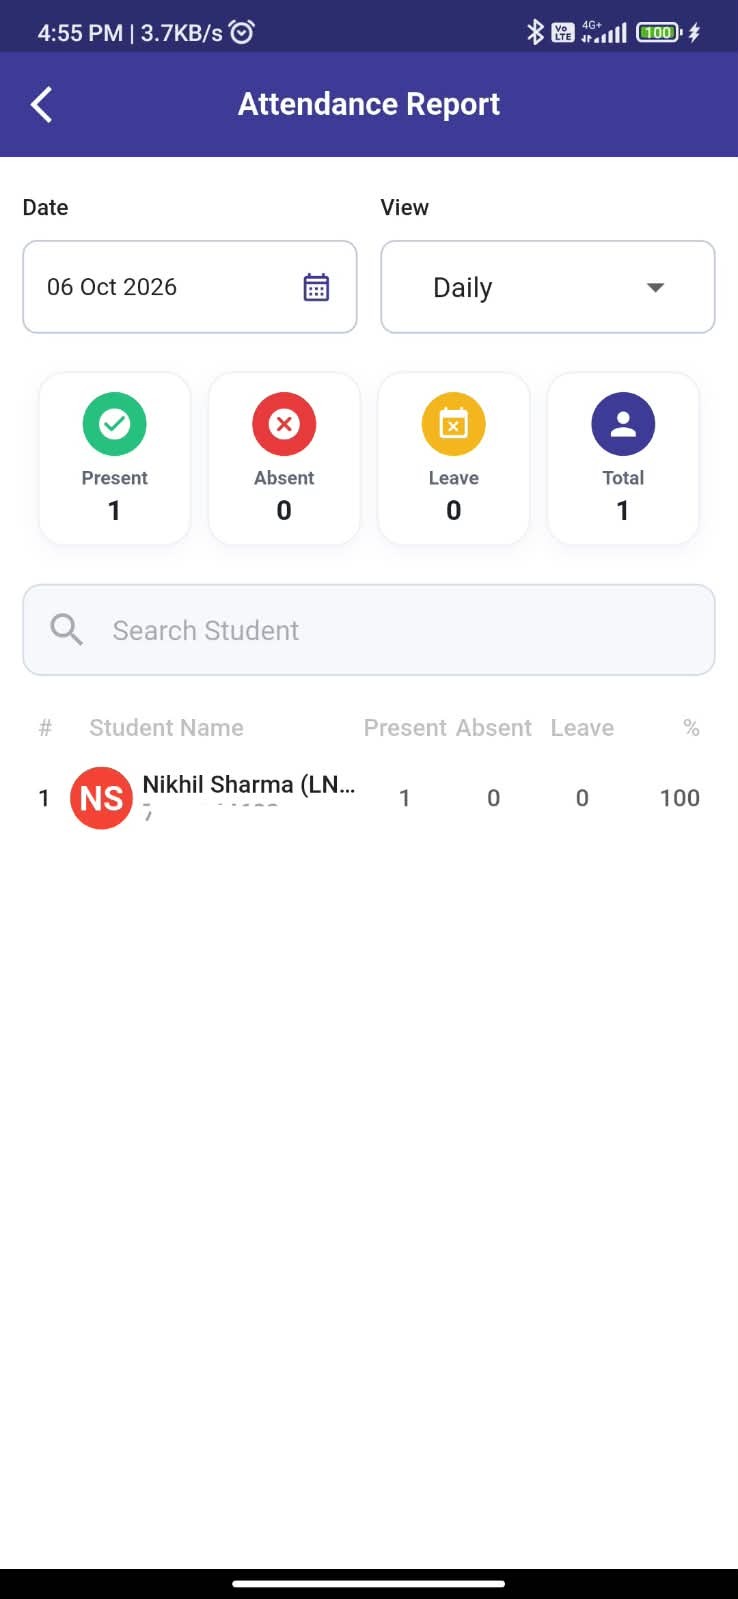
Image 38.jpg   |   In-App Activity Step 16
EduConnect in-app activity image 38 - View mark Attendance
17

Click Chat to Communicate with parents

Open Communication / Chat from the batch dashboard to communicate with parents.
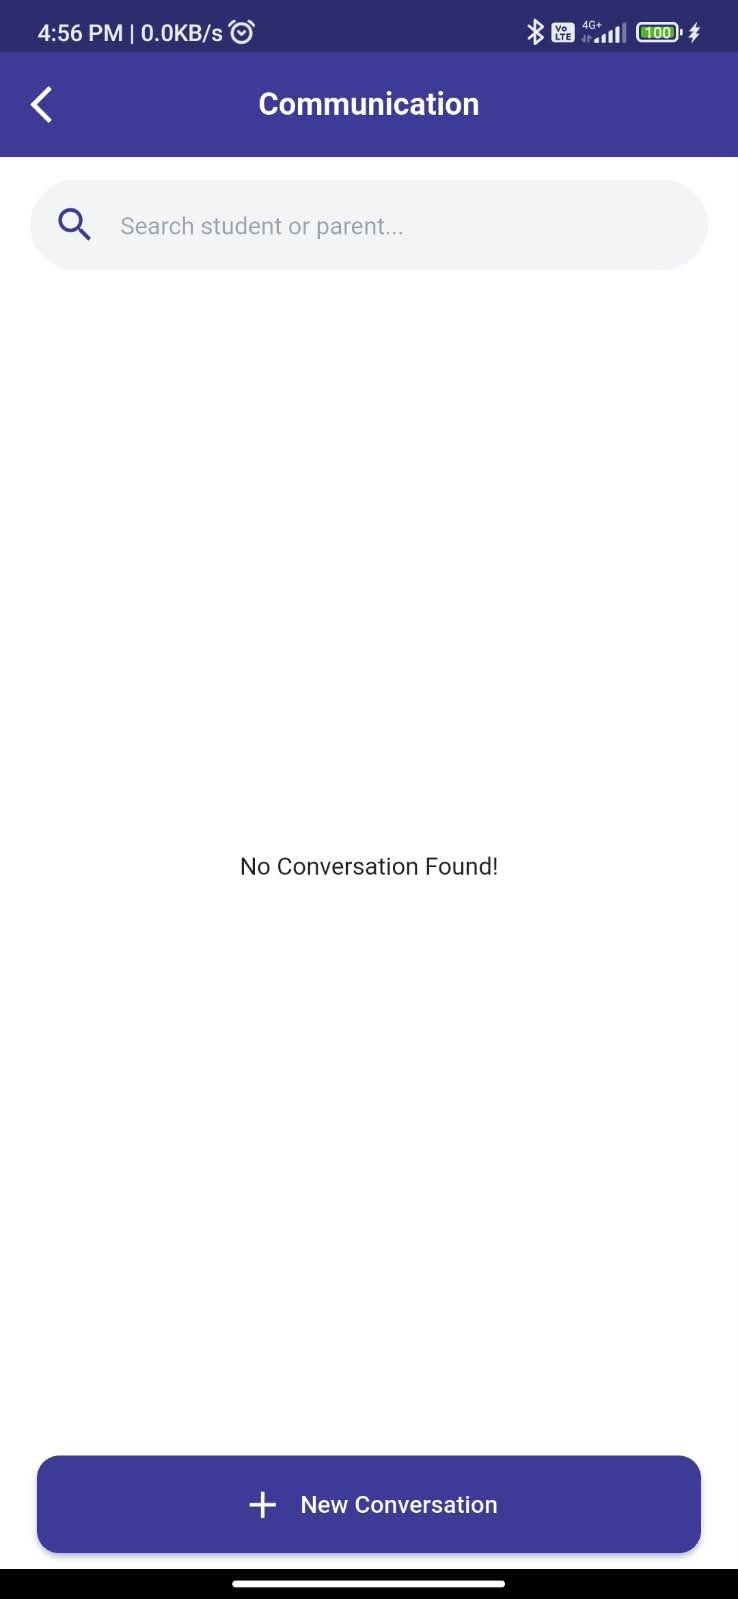
Image 39.jpg   |   In-App Activity Step 17
EduConnect in-app activity image 39 - Click Chat to Communicate with parents
18

Select Child to communicate with his/her parents and start chating

Select the child in a new conversation and start the parent communication.
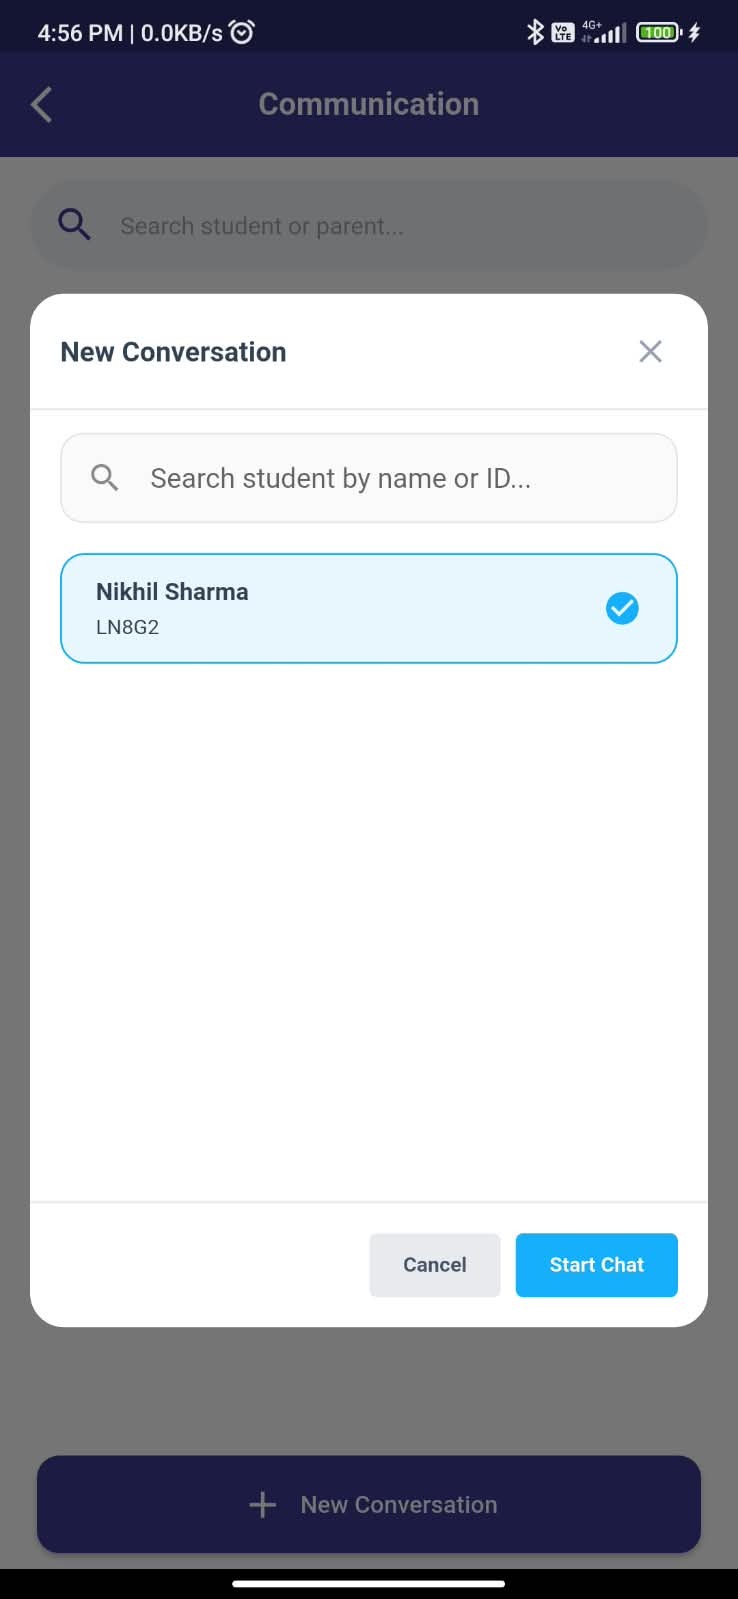
Image 40.jpg   |   In-App Activity Step 18
EduConnect in-app activity image 40 - Select Child to communicate with his/her parents and start chating
19

To Manage calander click Calander

From the batch dashboard, open Calendar to manage holidays and calendar activities.
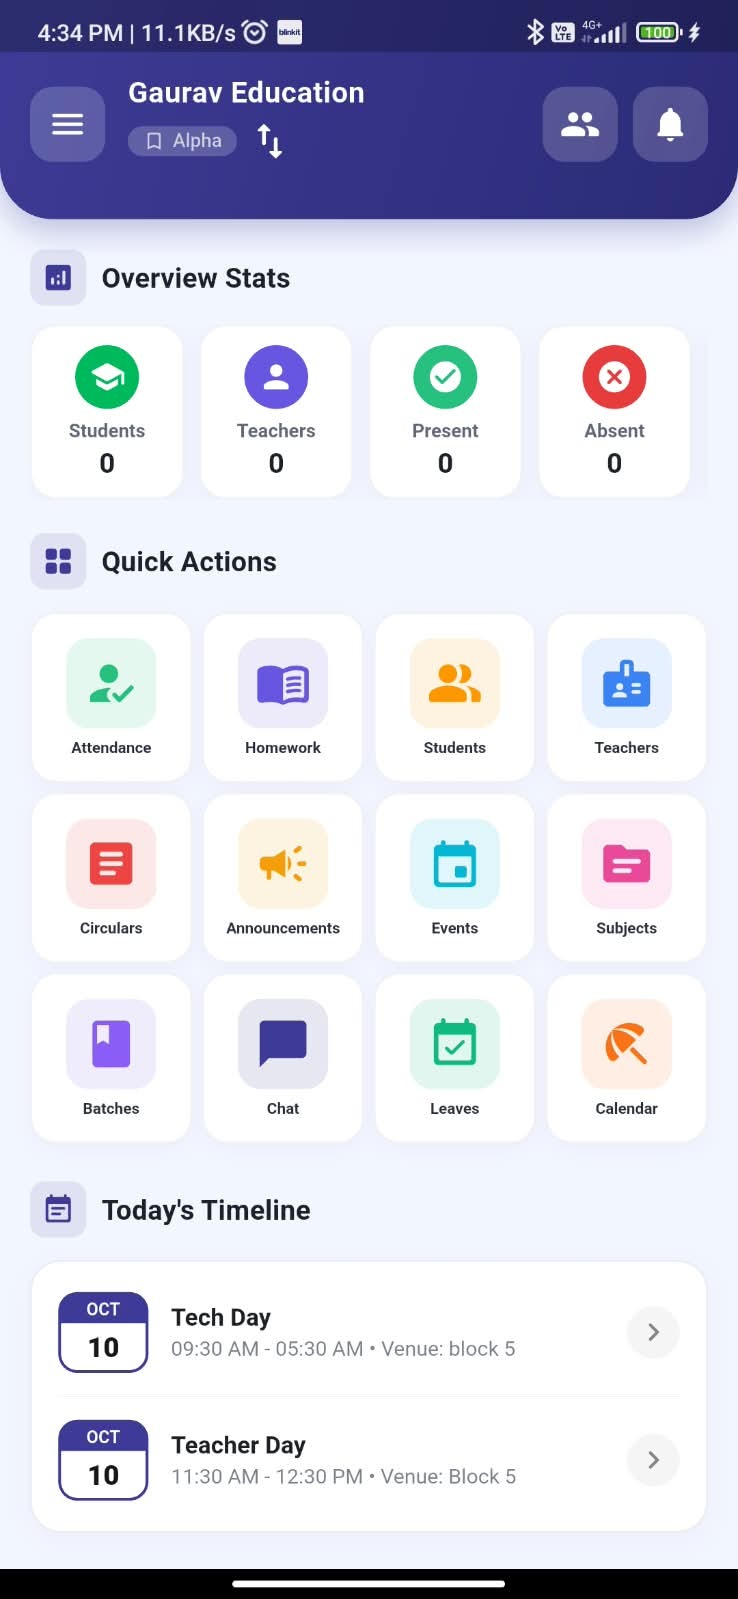
Image 26.jpg   |   In-App Activity Step 19
EduConnect in-app activity image 26 - To Manage calander click Calander
20

Add calander Holidays

Use Add Holiday to enter the holiday title, description, occurrence and applicable range.
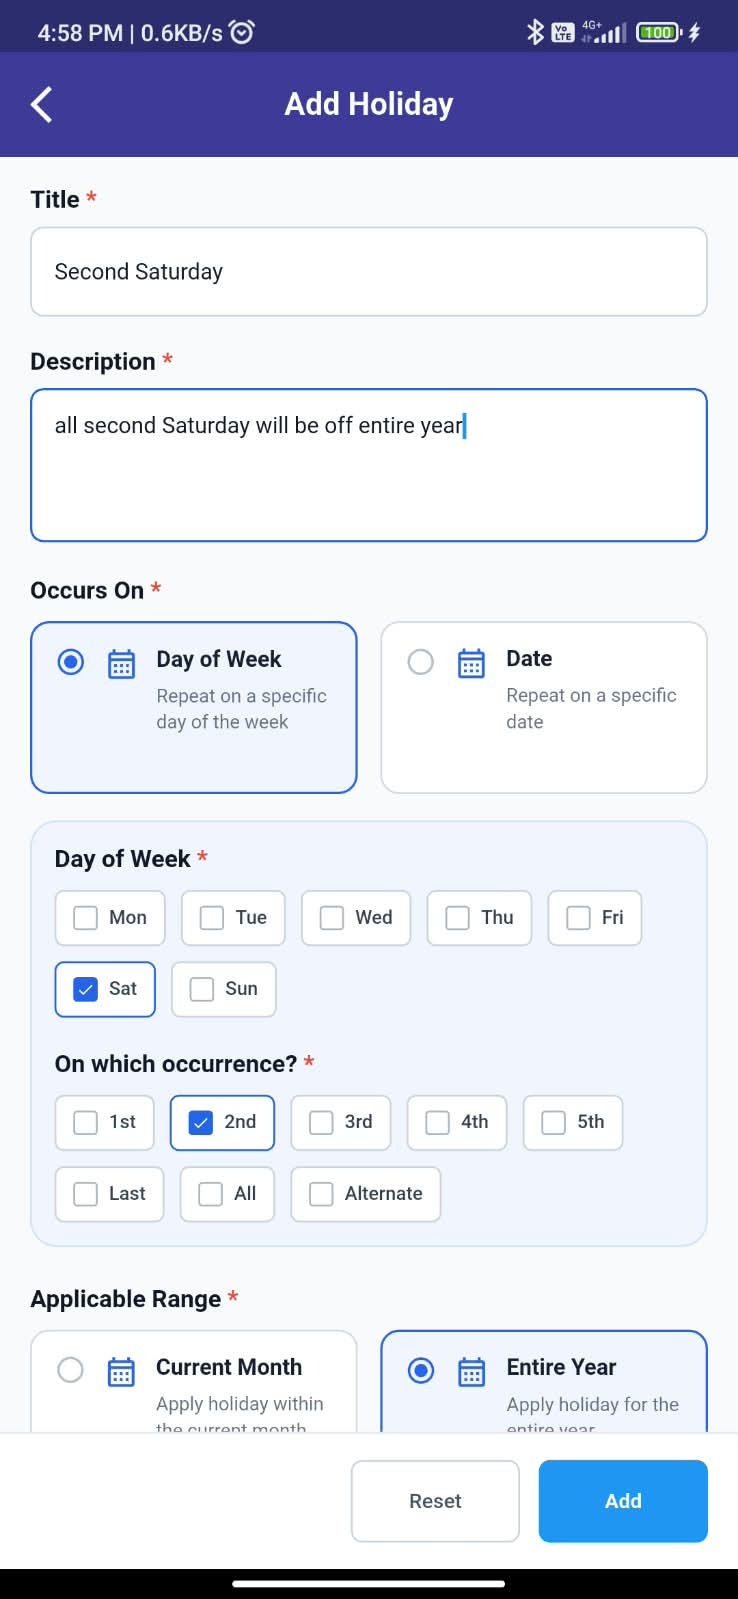
Image 41.jpg   |   In-App Activity Step 20
EduConnect in-app activity image 41 - Add calander Holidays
21

View Already added Holidays

Review holidays already added in the Holiday Calendar.
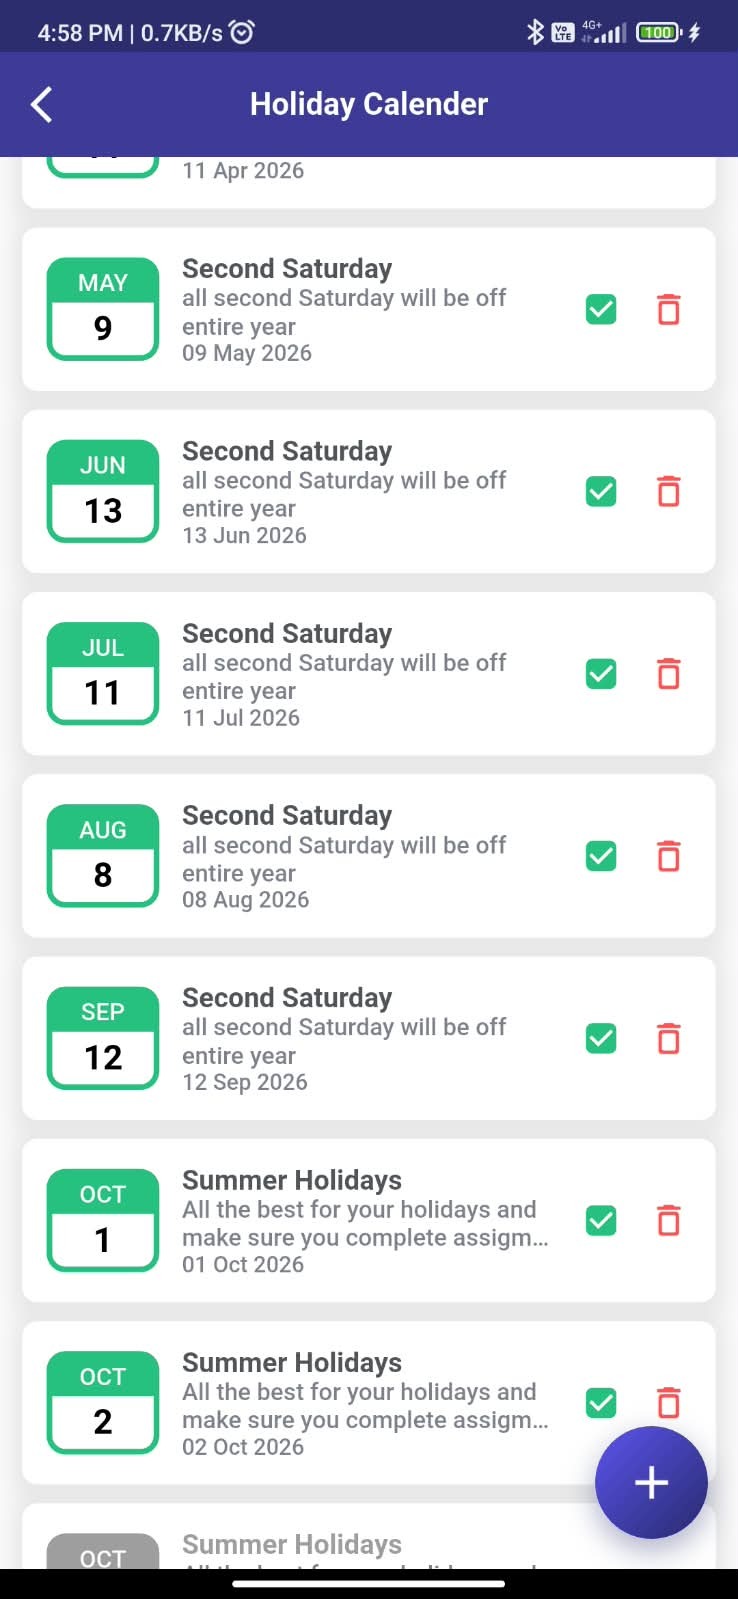
Image 42.jpg   |   In-App Activity Step 21
EduConnect in-app activity image 42 - View Already added Holidays
22

View Upcoming activities in Timeline

Review upcoming activities displayed in the dashboard timeline.

Image 26.jpg   |   In-App Activity Step 22
EduConnect in-app activity image 26 - View Upcoming activities in Timeline