EduConnect Application Workflow

EduConnect App Workflow

End-to-end EduConnect application workflow from opening Google Play Store through registration, OTP verification, login, institute/business management, batch creation, batch settings, batch selection and the batch dashboard.

▶ Watch / Search EduConnect Workflow on YouTube ▶ Watch / EduConnect Dashboard Explained | Manage Students, Teachers & Classes Easily ▶ Watch / EduConnect Leaves & Events | Manage Student Leaves, Notices & Events Easily
1

Open Play Store

Open Google Play Store on the Android device.
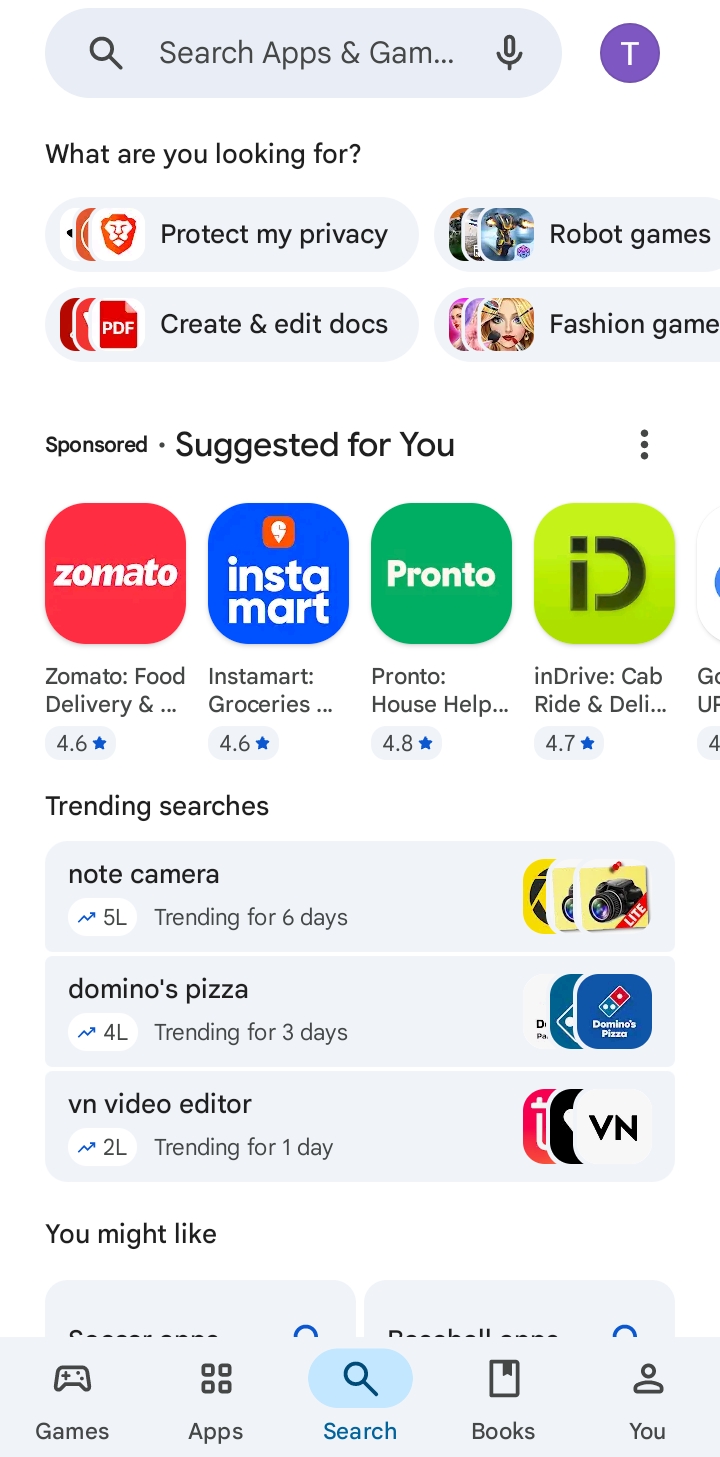
Image 0.jpg   |   Workflow Step 1
EduConnect workflow image 1 - Open Play Store
2

Search App Name

Search for EduConnect in Google Play Store.
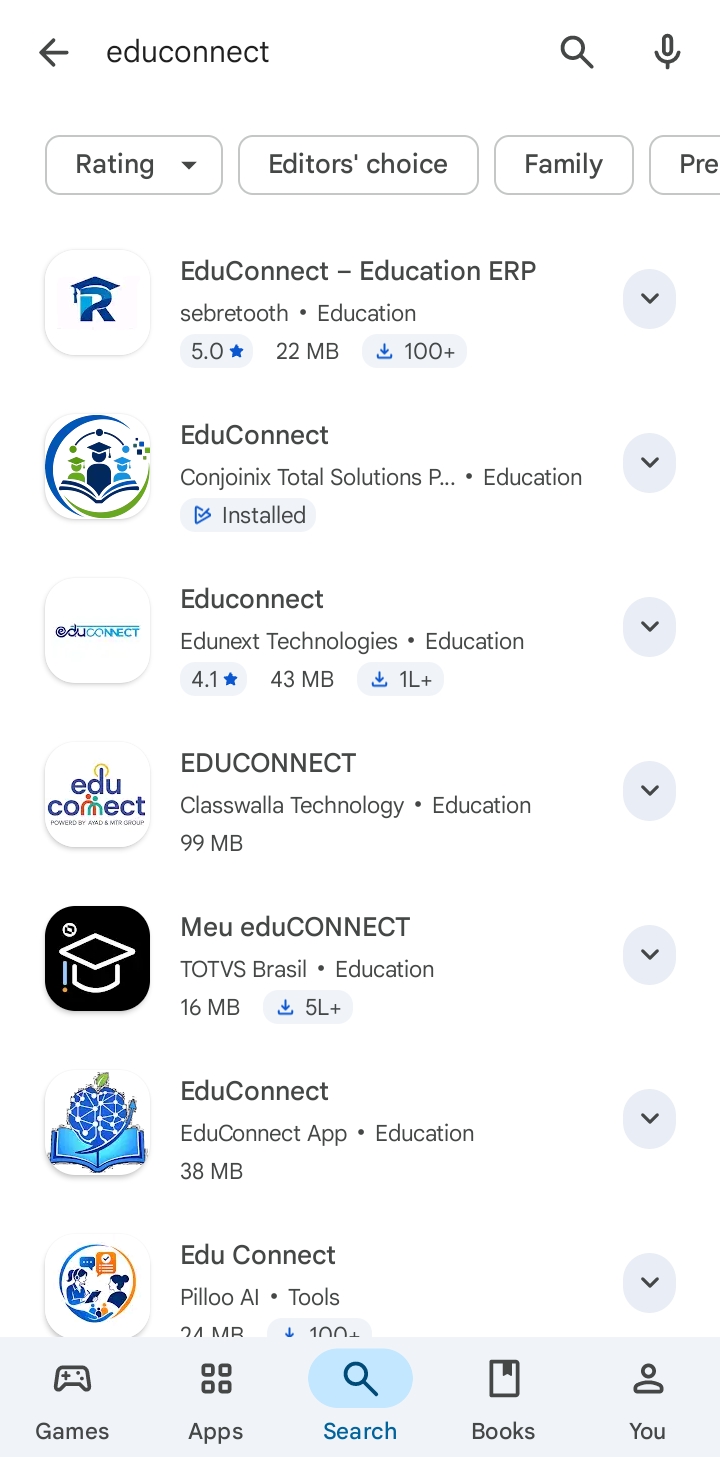
Image 00.jpg   |   Workflow Step 2
EduConnect workflow image 1 - Search App Name
3

Install Application

Open the EduConnect listing and install the application.
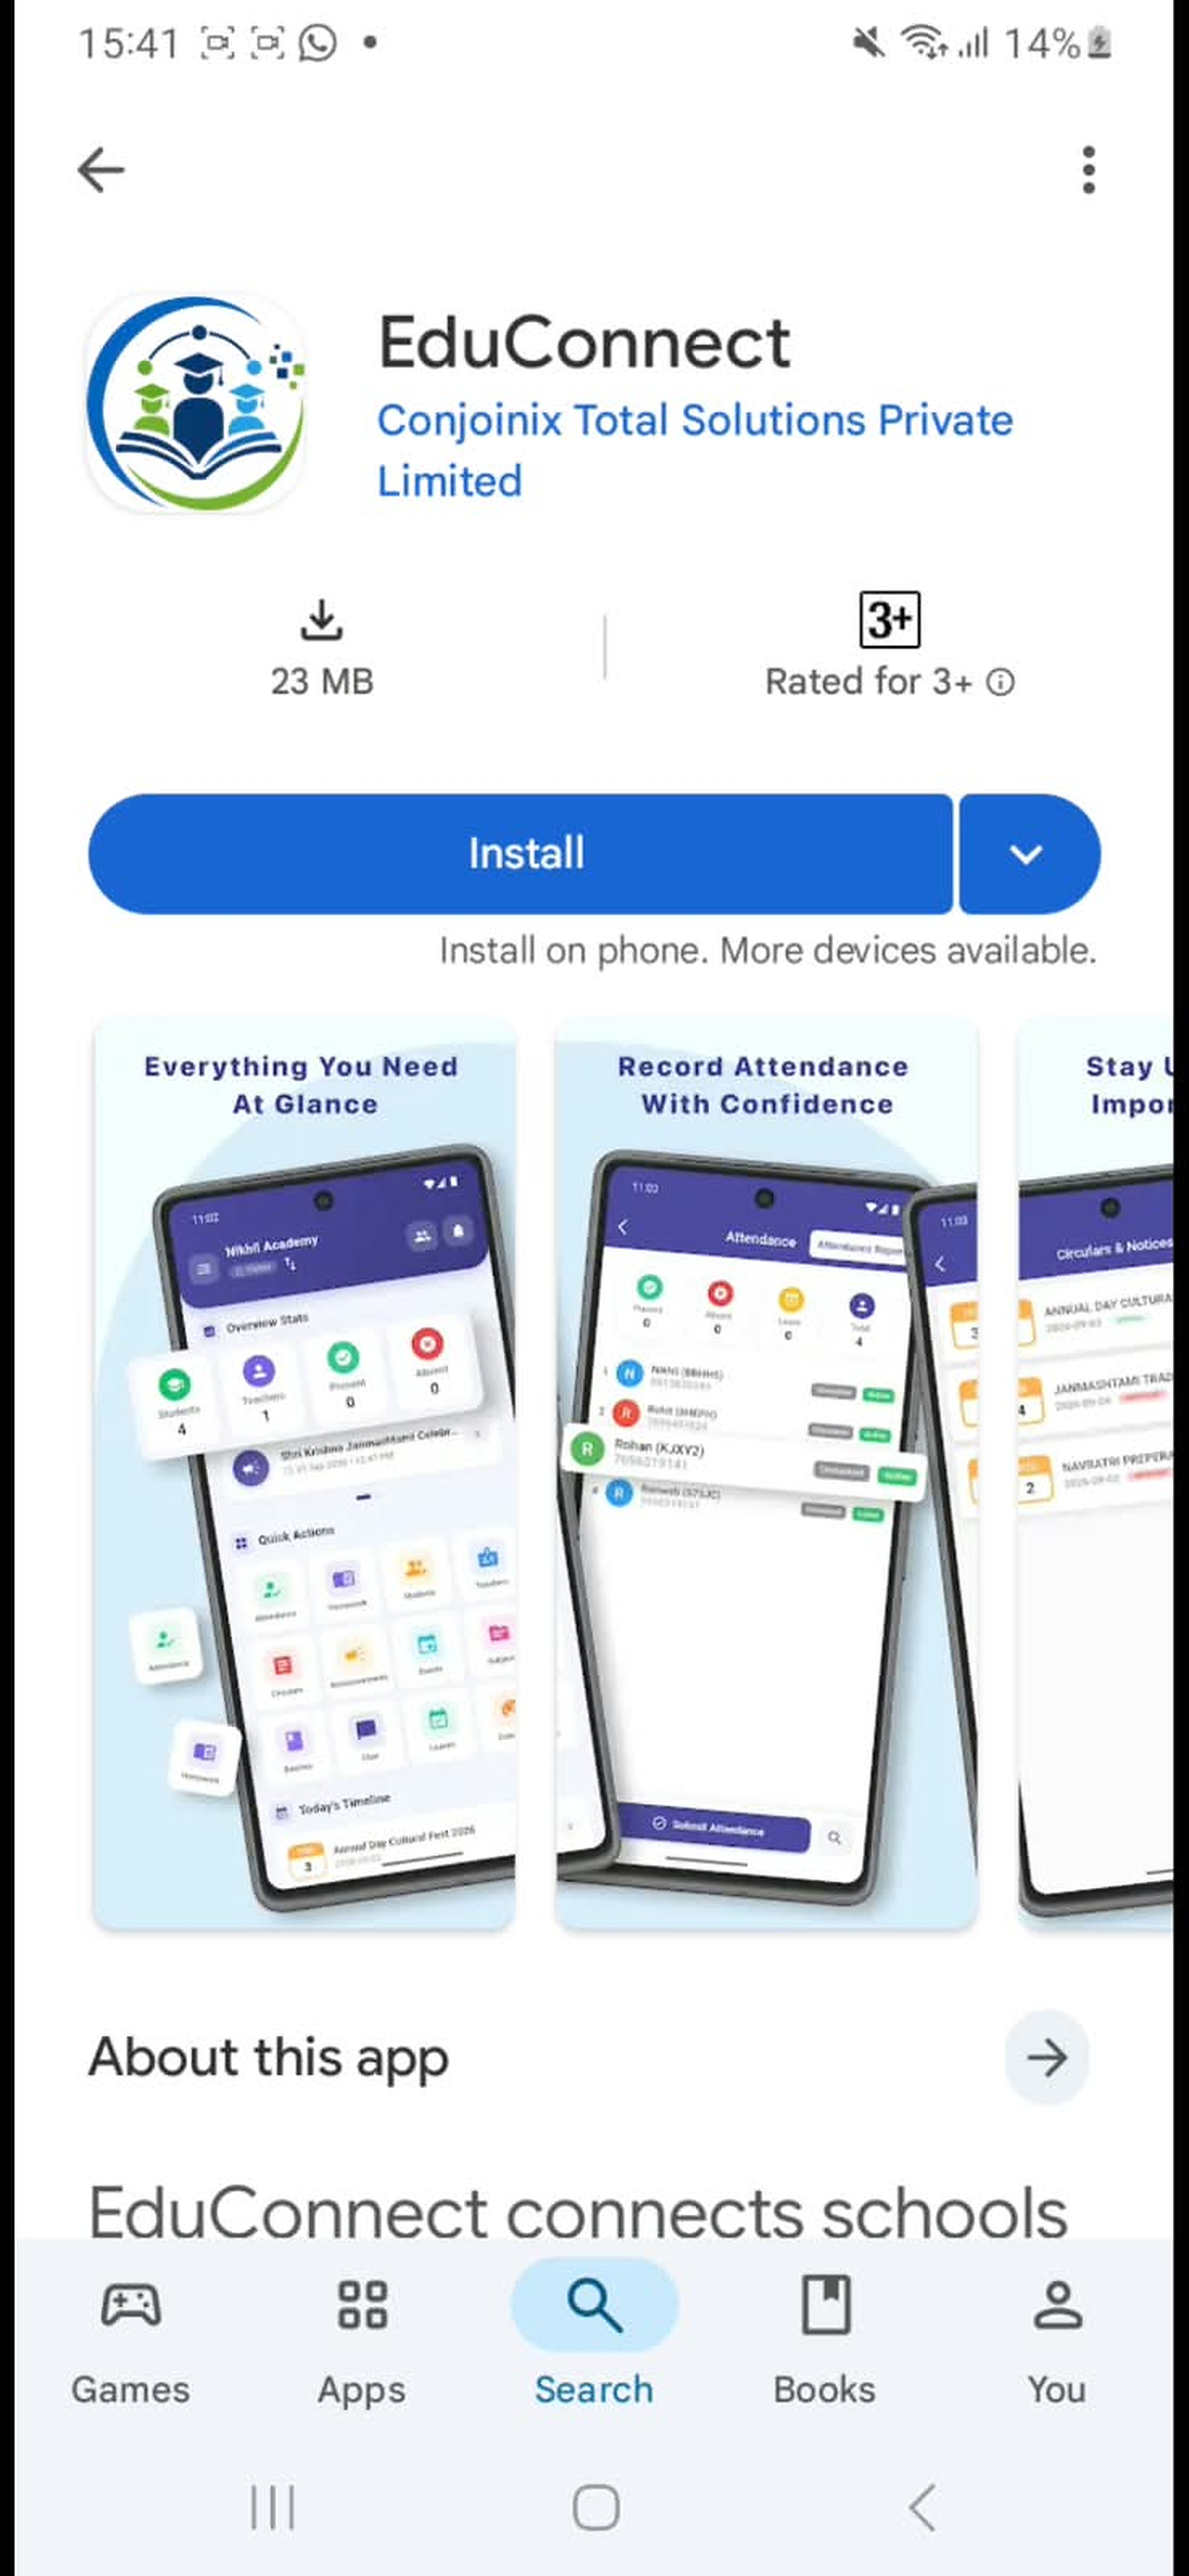
Image 1.jpg   |   Workflow Step 3
EduConnect workflow image 1 - Install Application
4

Run Application

Launch the installed application and wait for the EduConnect startup screen.
Image 2.jpg   |   Workflow Step 4
EduConnect workflow image 2 - Run Application
5

Existing Member or Create Account

Choose the appropriate option: existing member or Create Account.
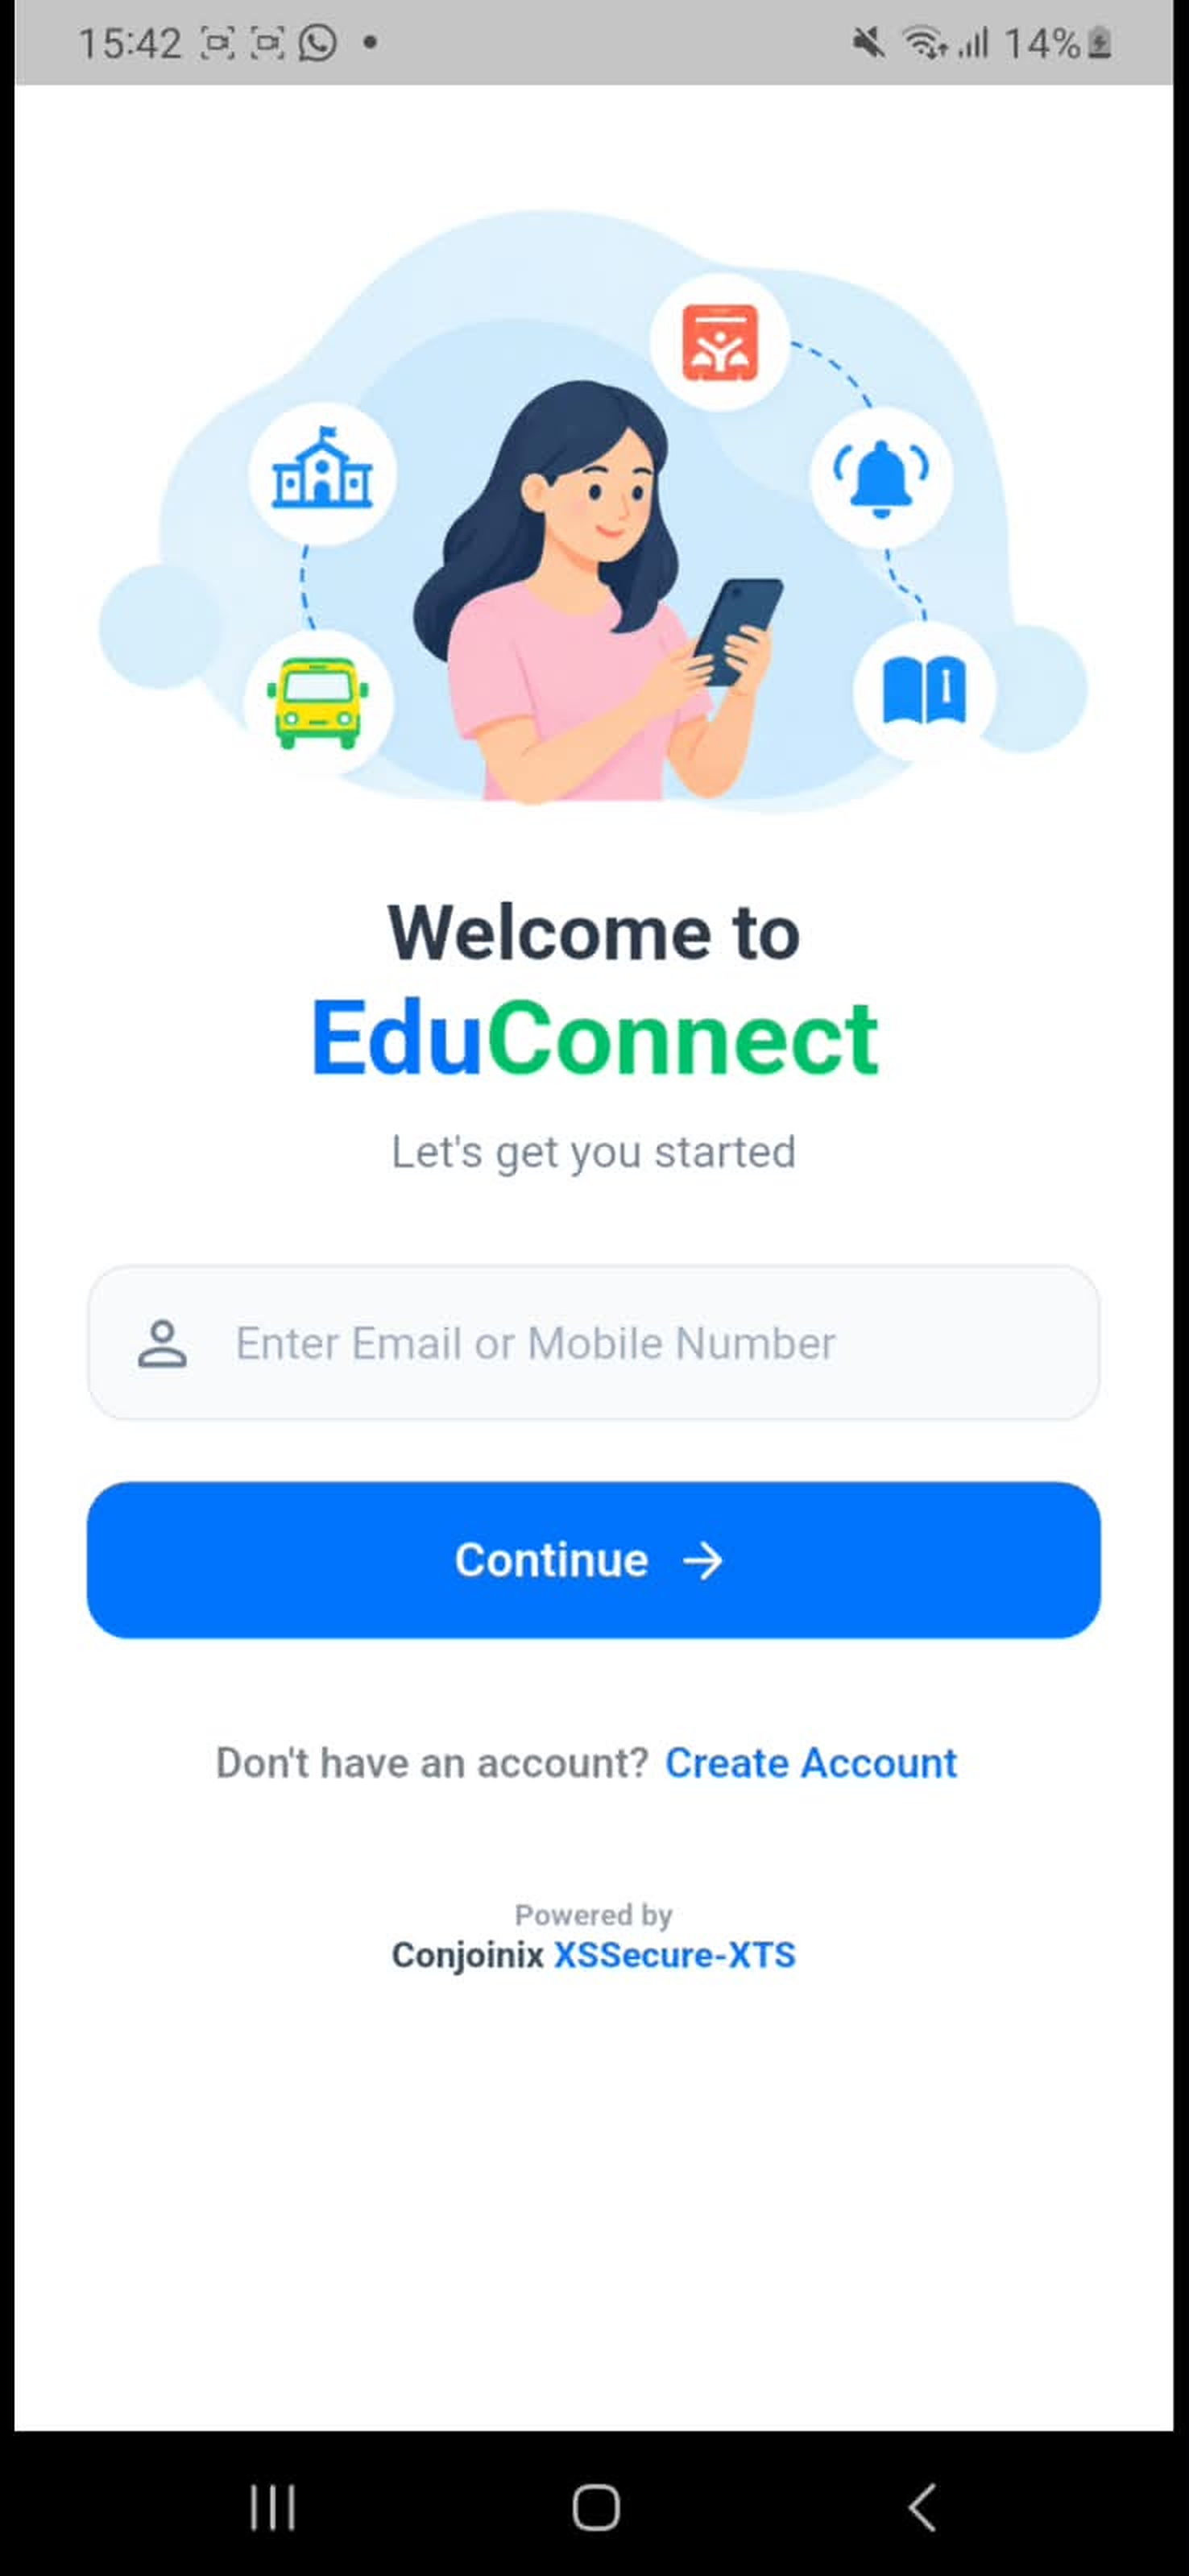
Image 3.jpg   |   Workflow Step 5
EduConnect workflow image 3 - Existing Member or Create Account
6

Fill Required Details

Enter the required registration details and submit the registration form.
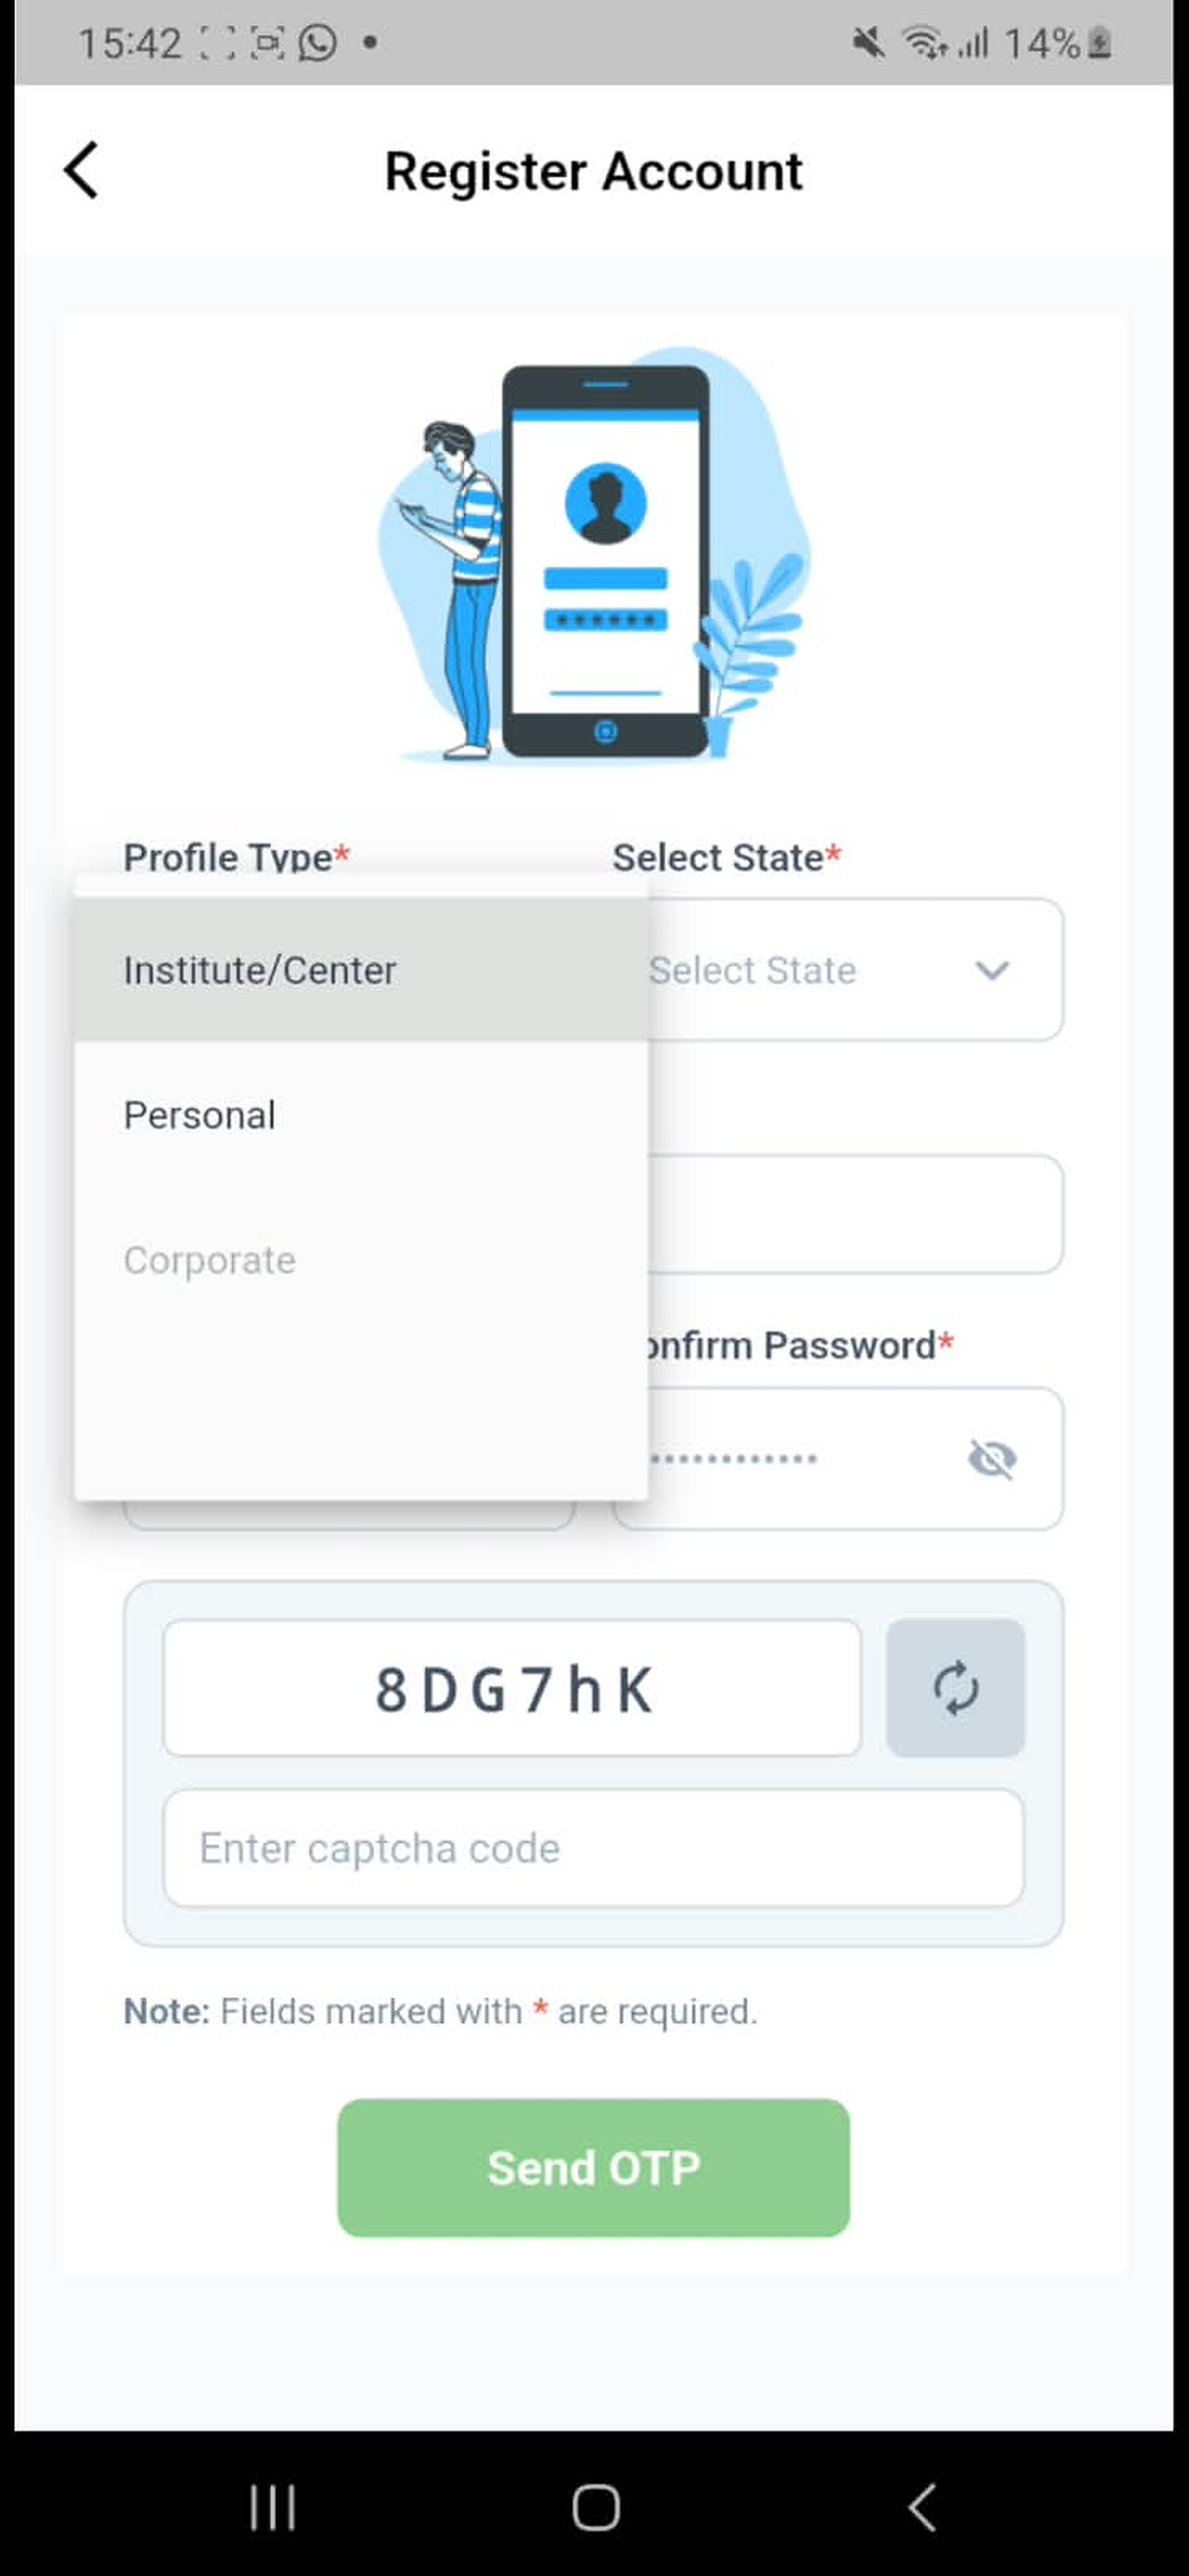
Image 4.jpg   |   Workflow Step 6
EduConnect workflow image 4 - Fill Required Details
7

Submit & Verify Mobile OTP

Submit the form, enter the mobile OTP and verify the registered number.
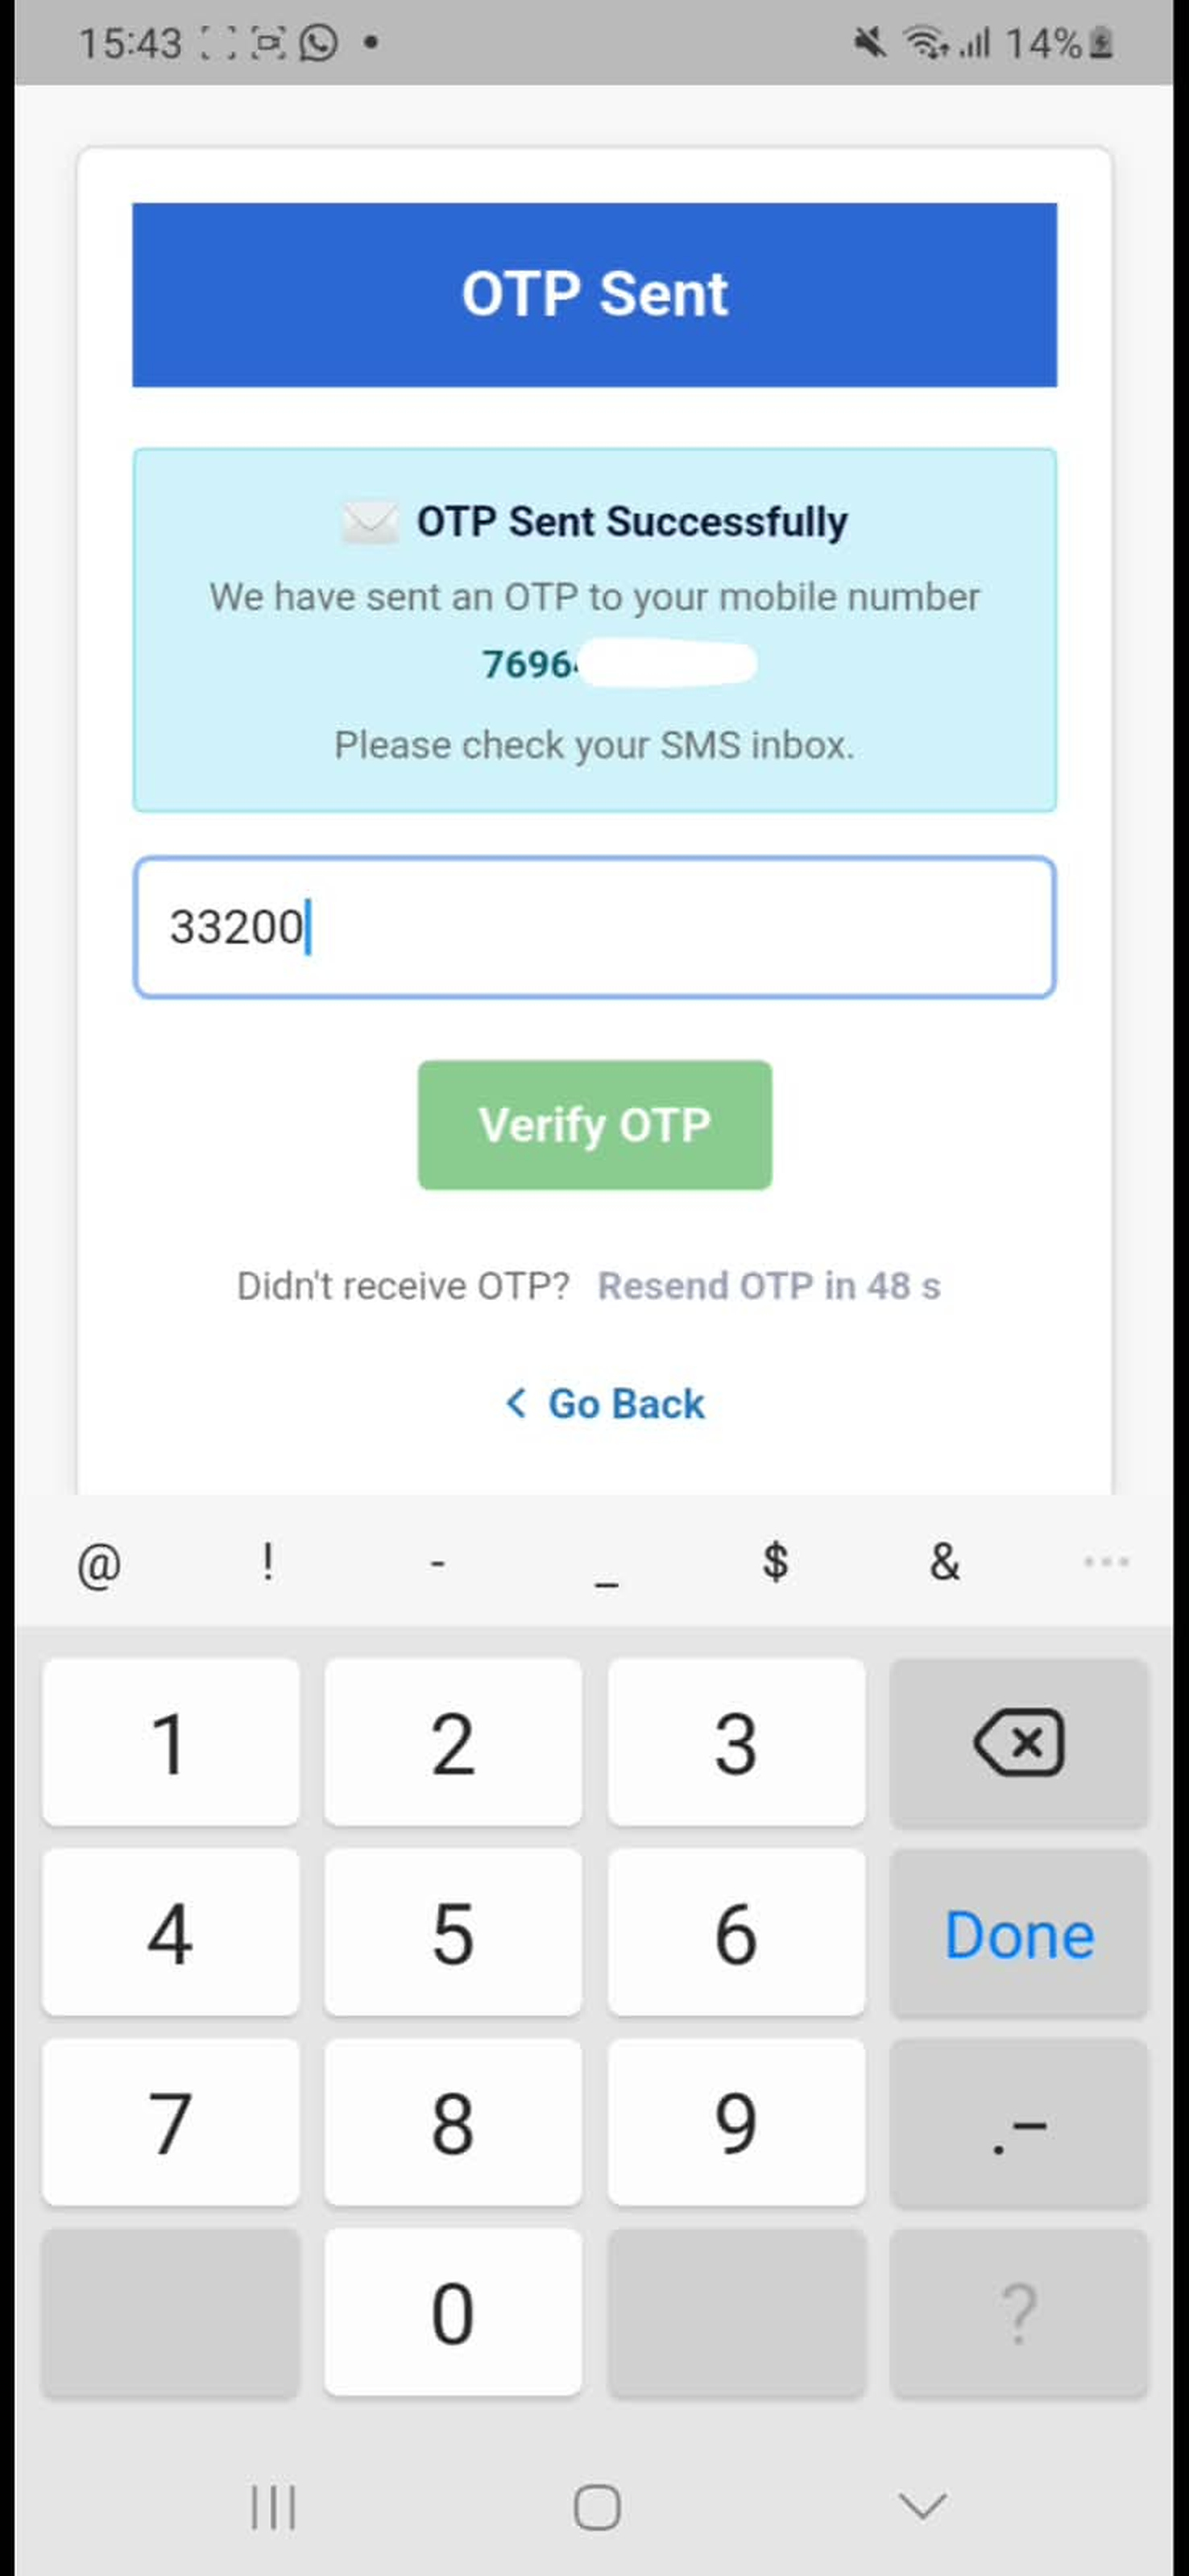
Image 5.jpg   |   Workflow Step 7
EduConnect workflow image 5 - Submit & Verify Mobile OTP
8

EduConnect Login details

Review the successful registration screen and the generated login credentials.
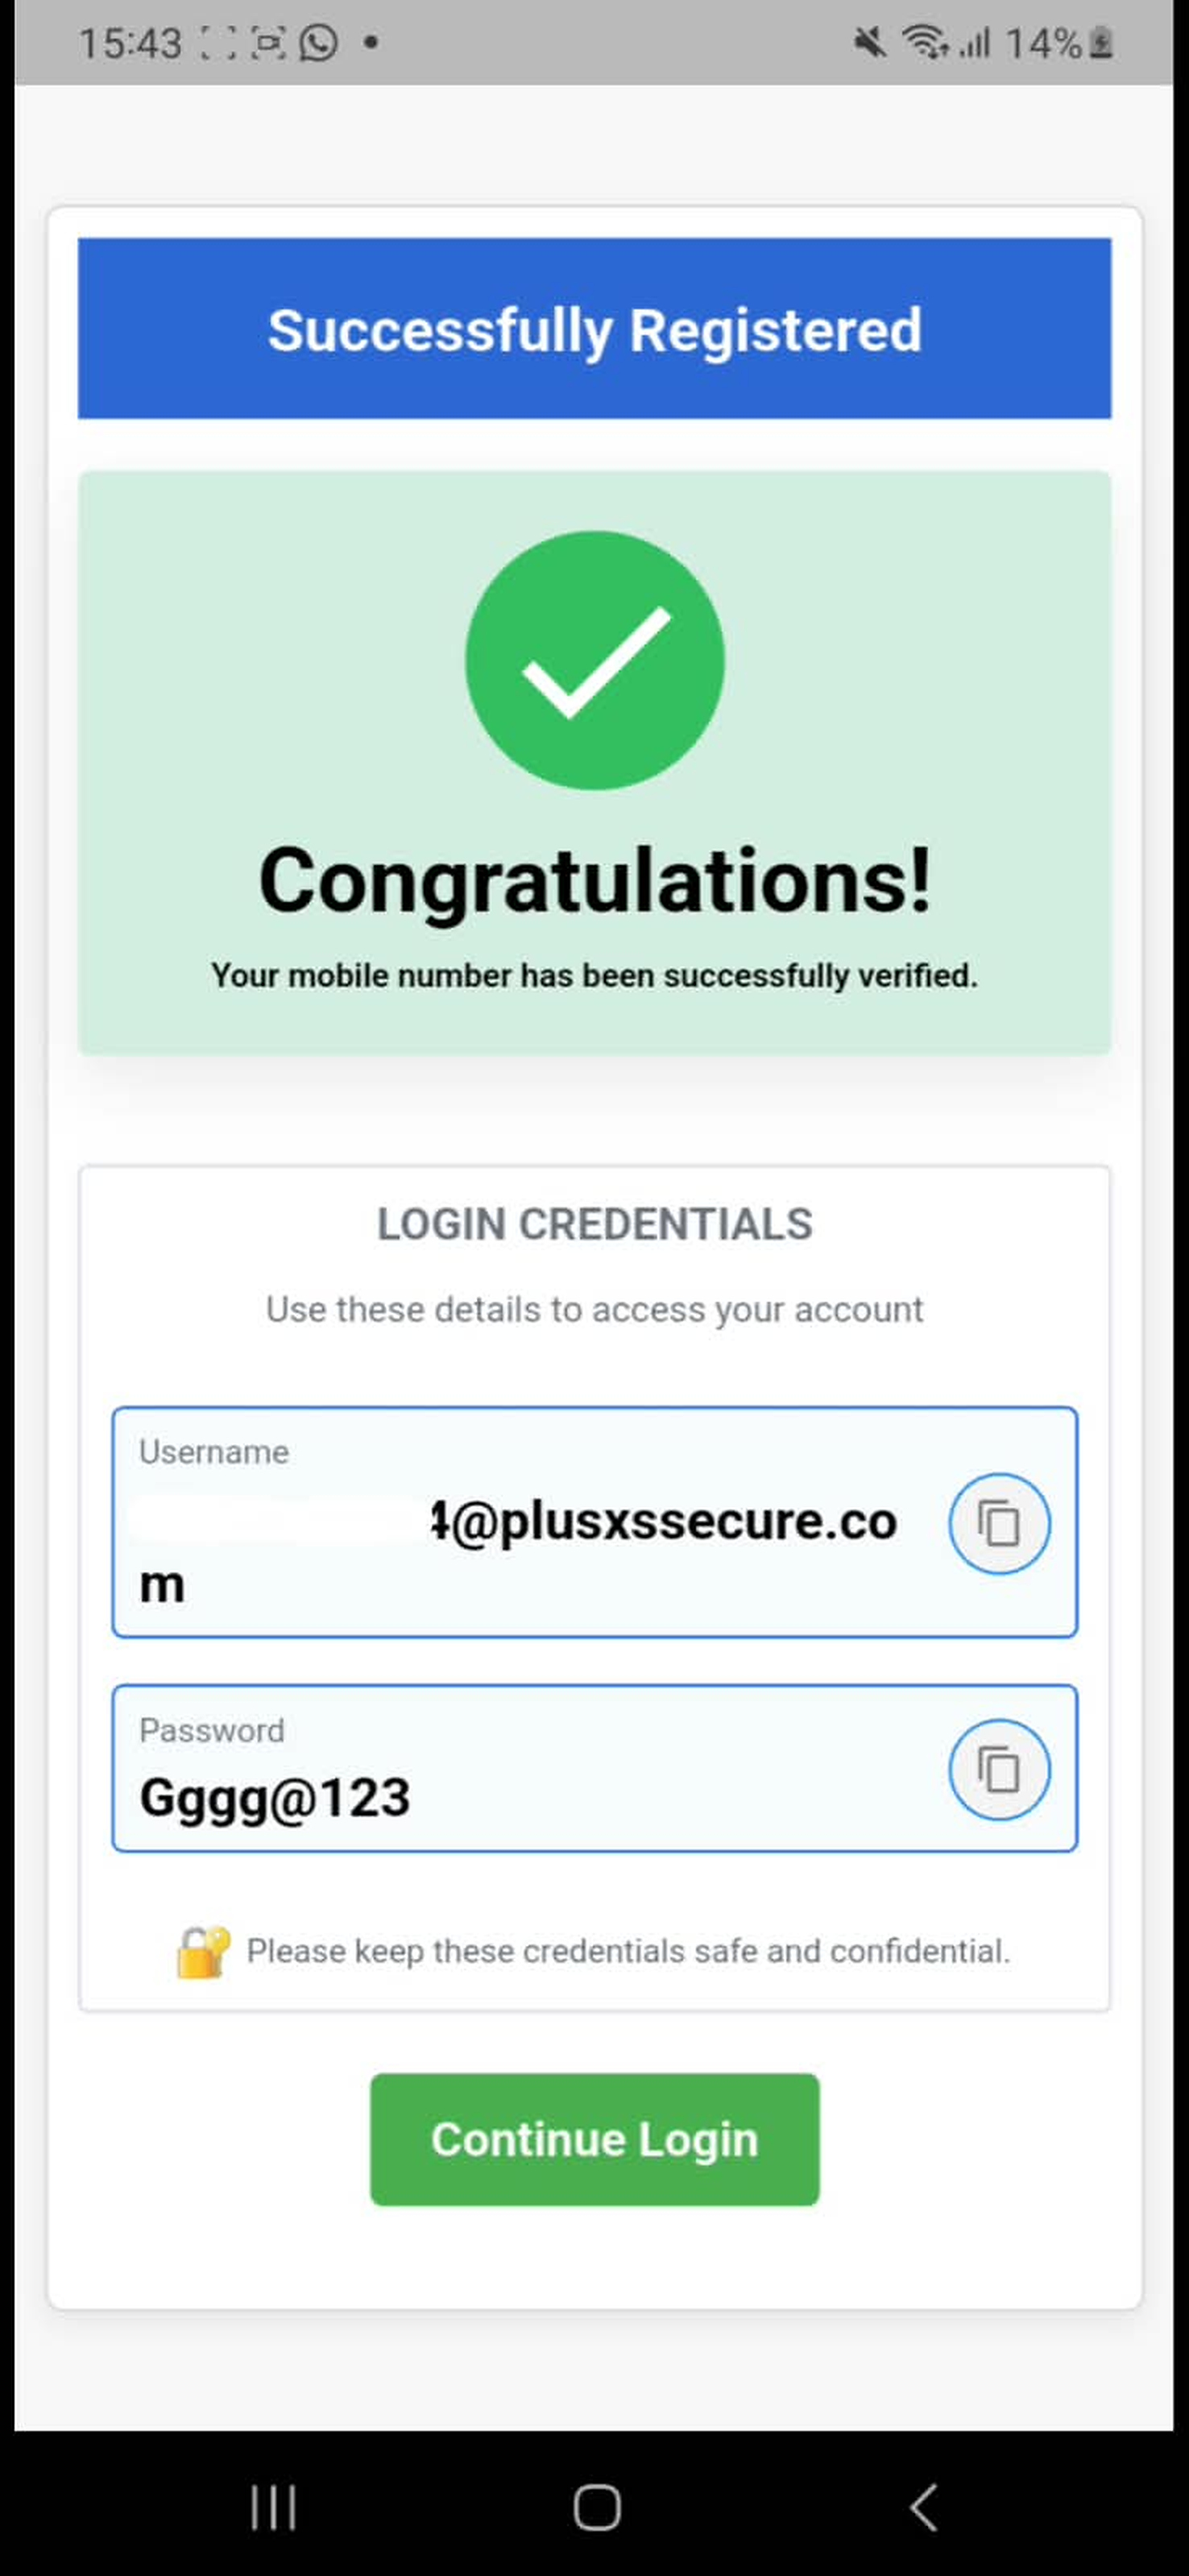
Image 6.jpg   |   Workflow Step 8
EduConnect workflow image 6 - EduConnect Login details
9

Login to Educonnect

Use the EduConnect credentials to sign in.
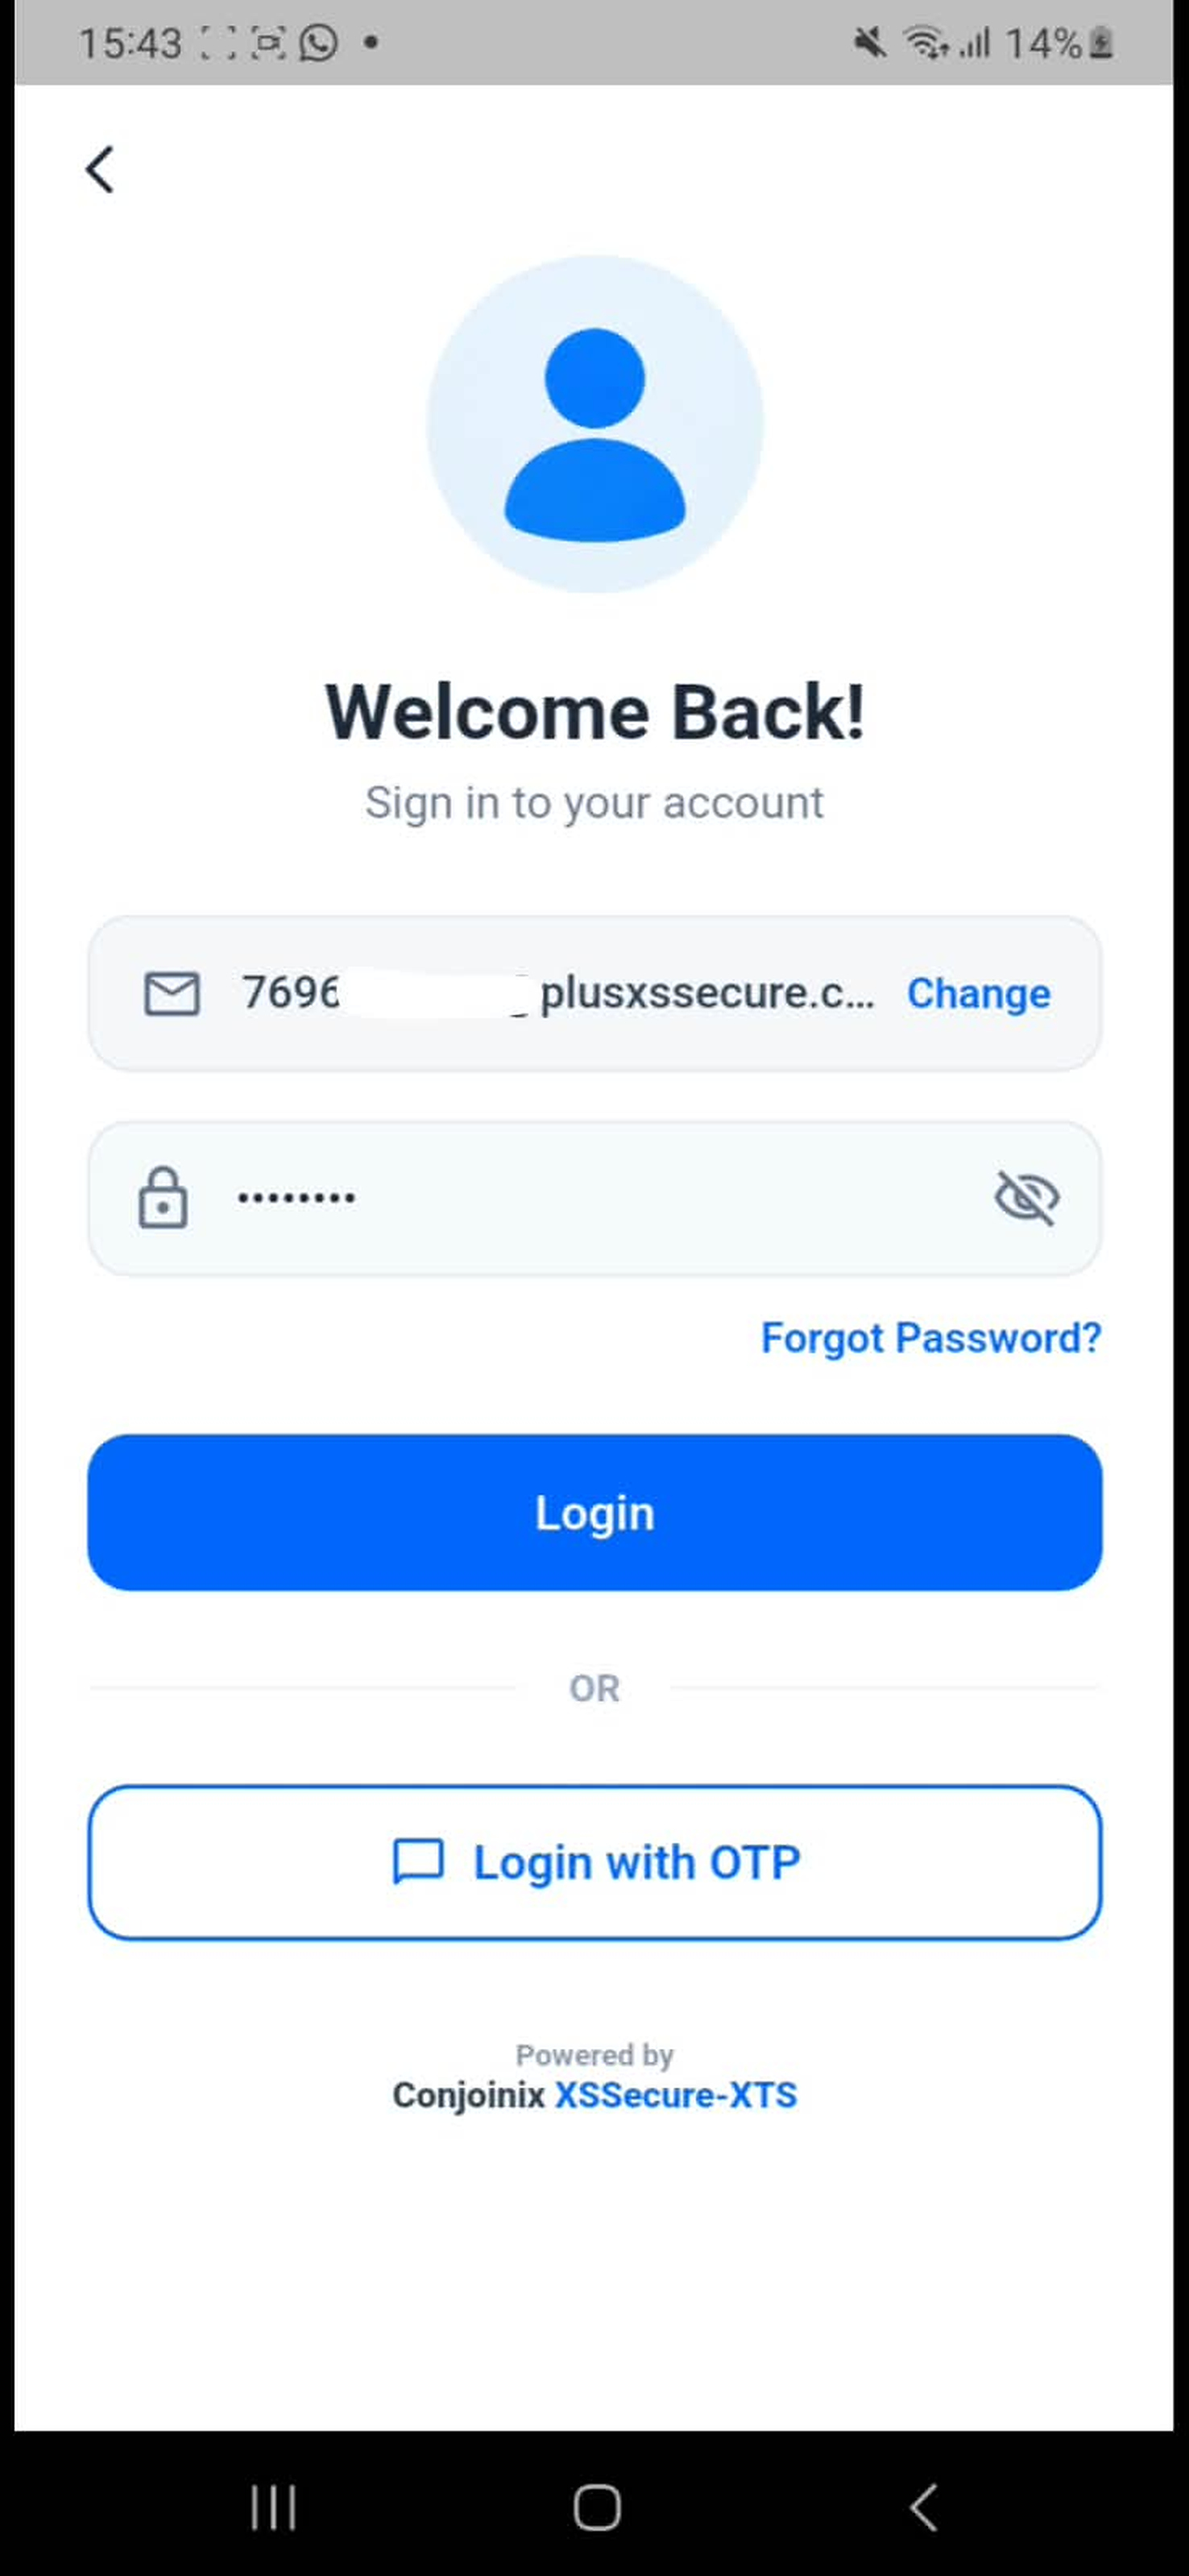
Image 7.jpg   |   Workflow Step 9
EduConnect workflow image 7 - Login to Educonnect
10

Business/Institute Details for Public

Review the institute/business information maintained for the public-facing account.
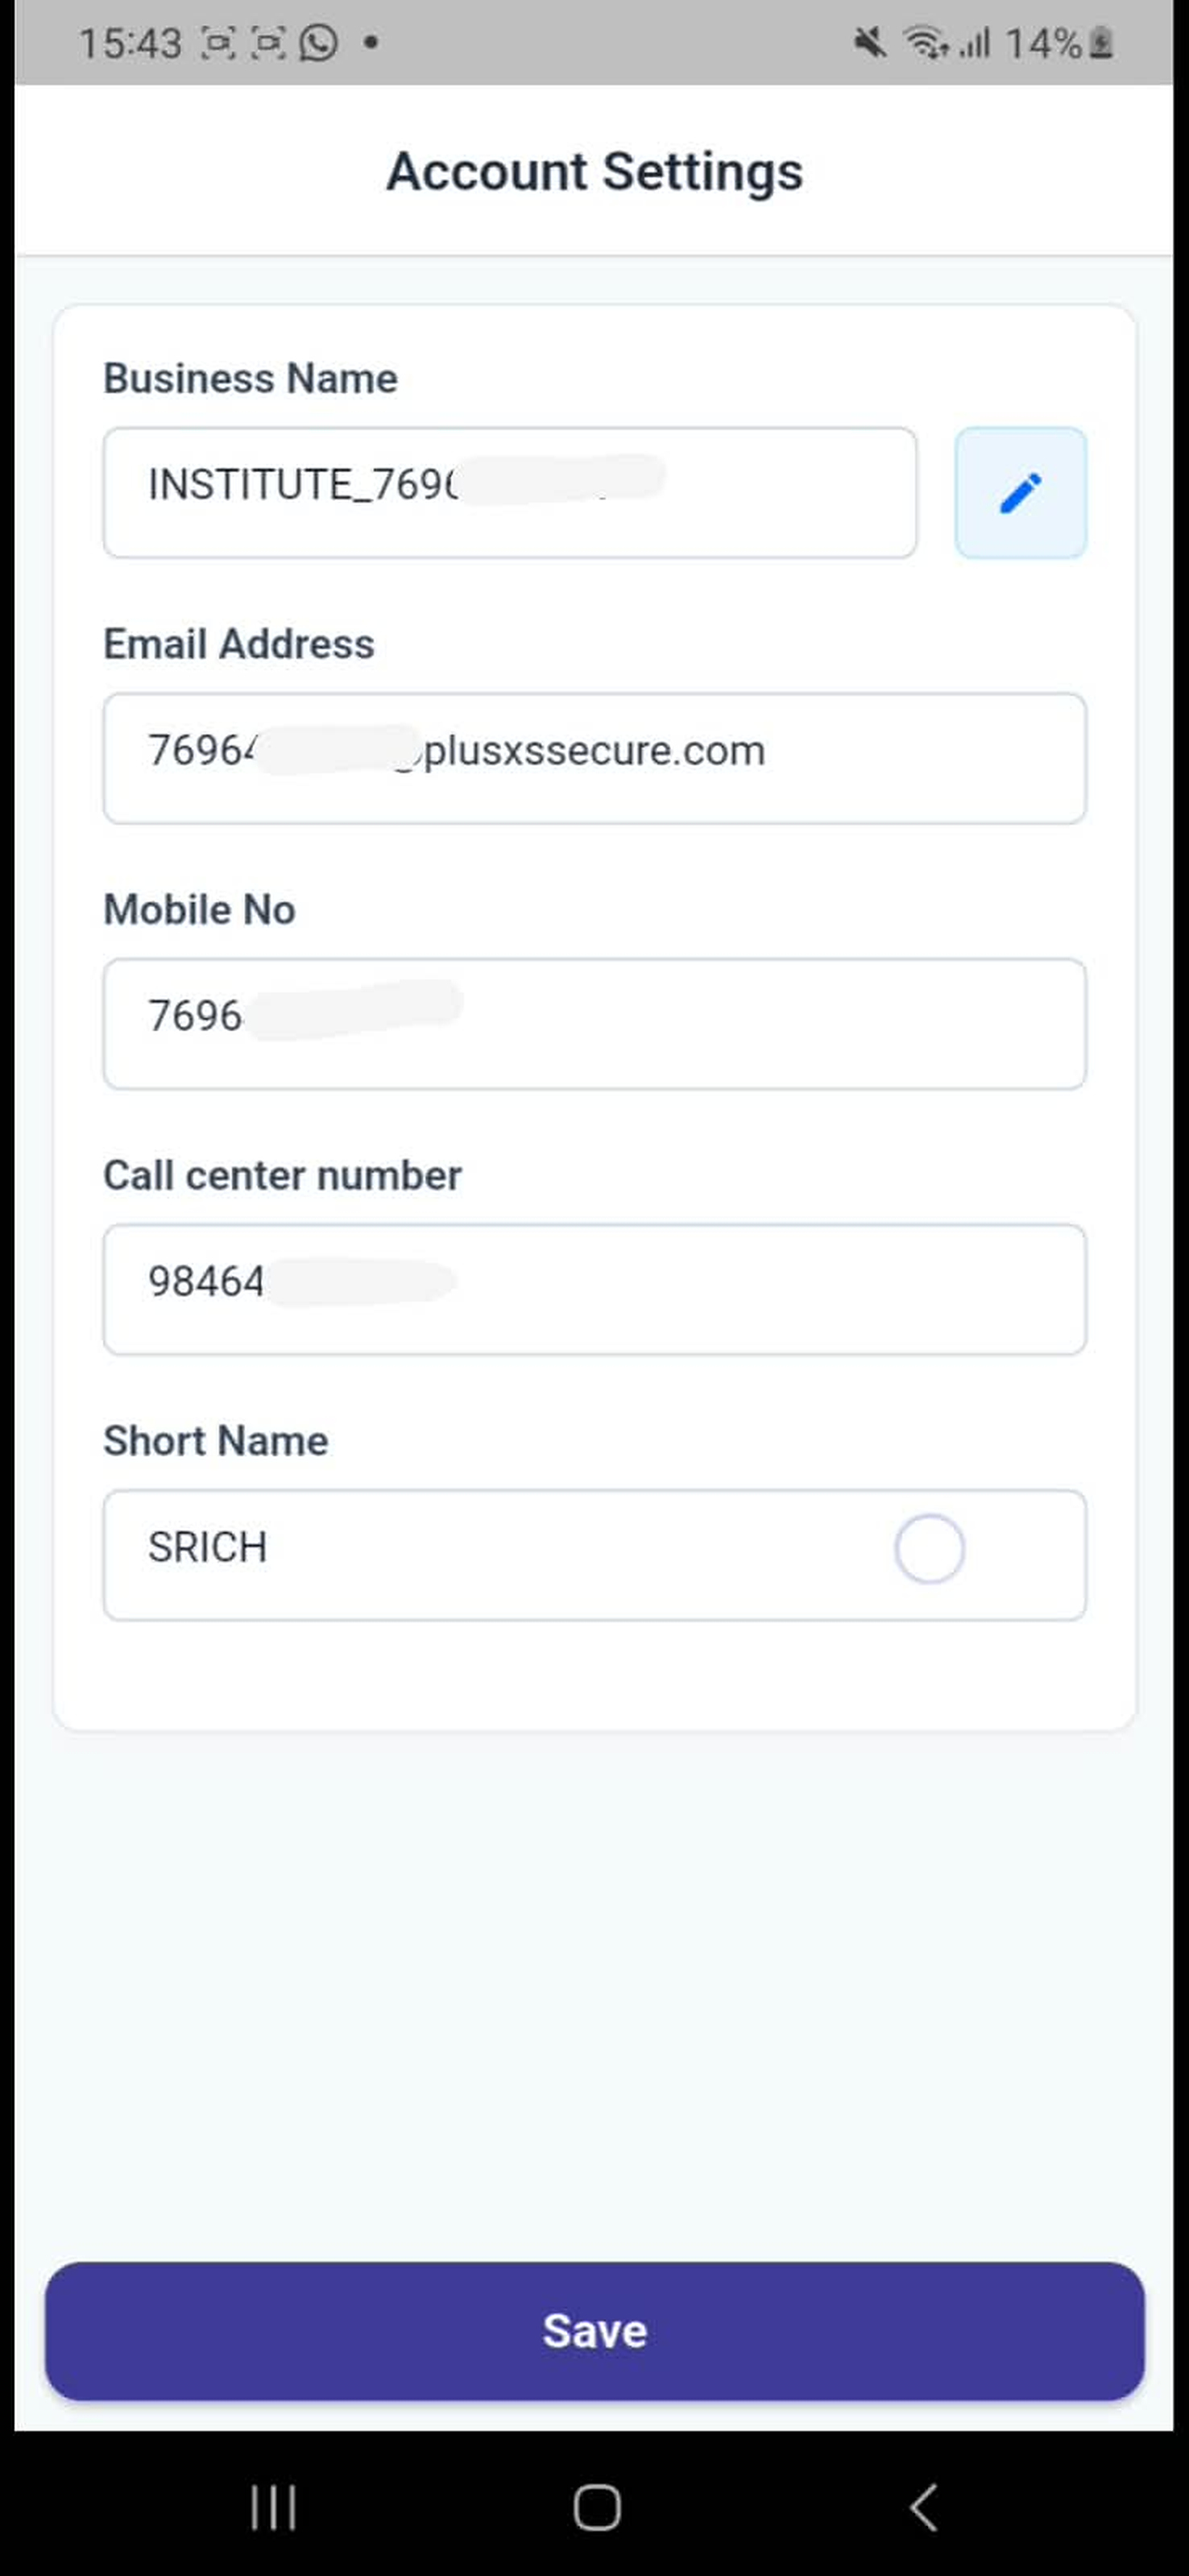
Image 9.jpg   |   Workflow Step 10
EduConnect workflow image 9 - Business/Institute Details for Public
11

Update Business/Institute details

Edit and save the business/institute information as required.
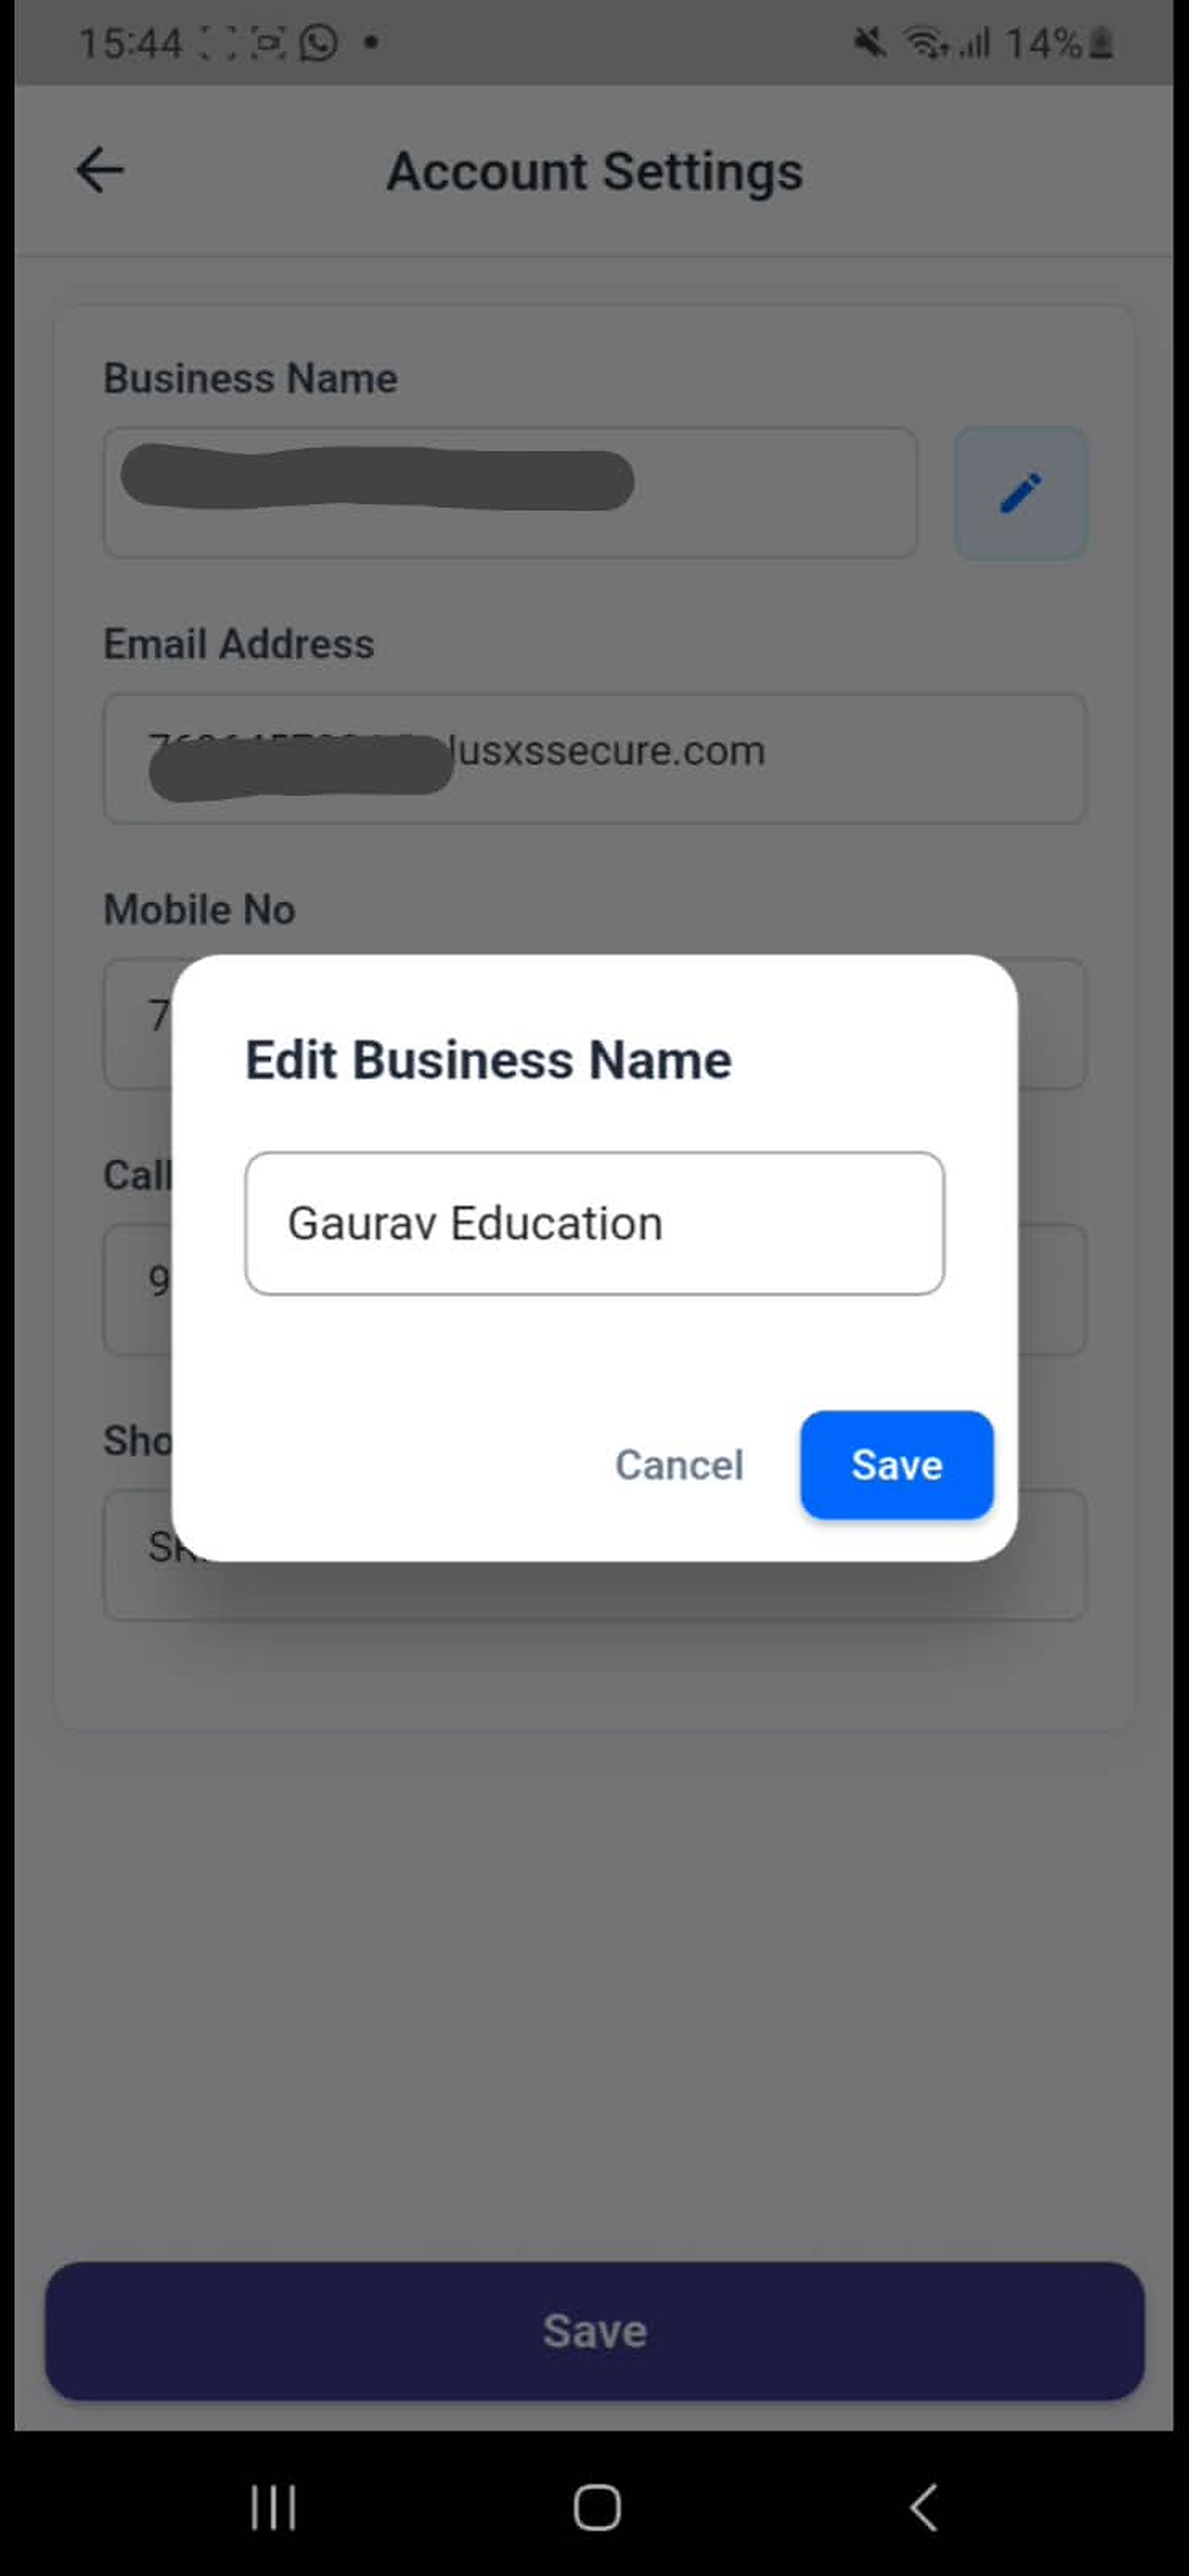
Image 8.jpg   |   Workflow Step 11
EduConnect workflow image 8 - Update Business/Institute details
12

Batch List

Open the batch area and view the available batch list or no-batch state.
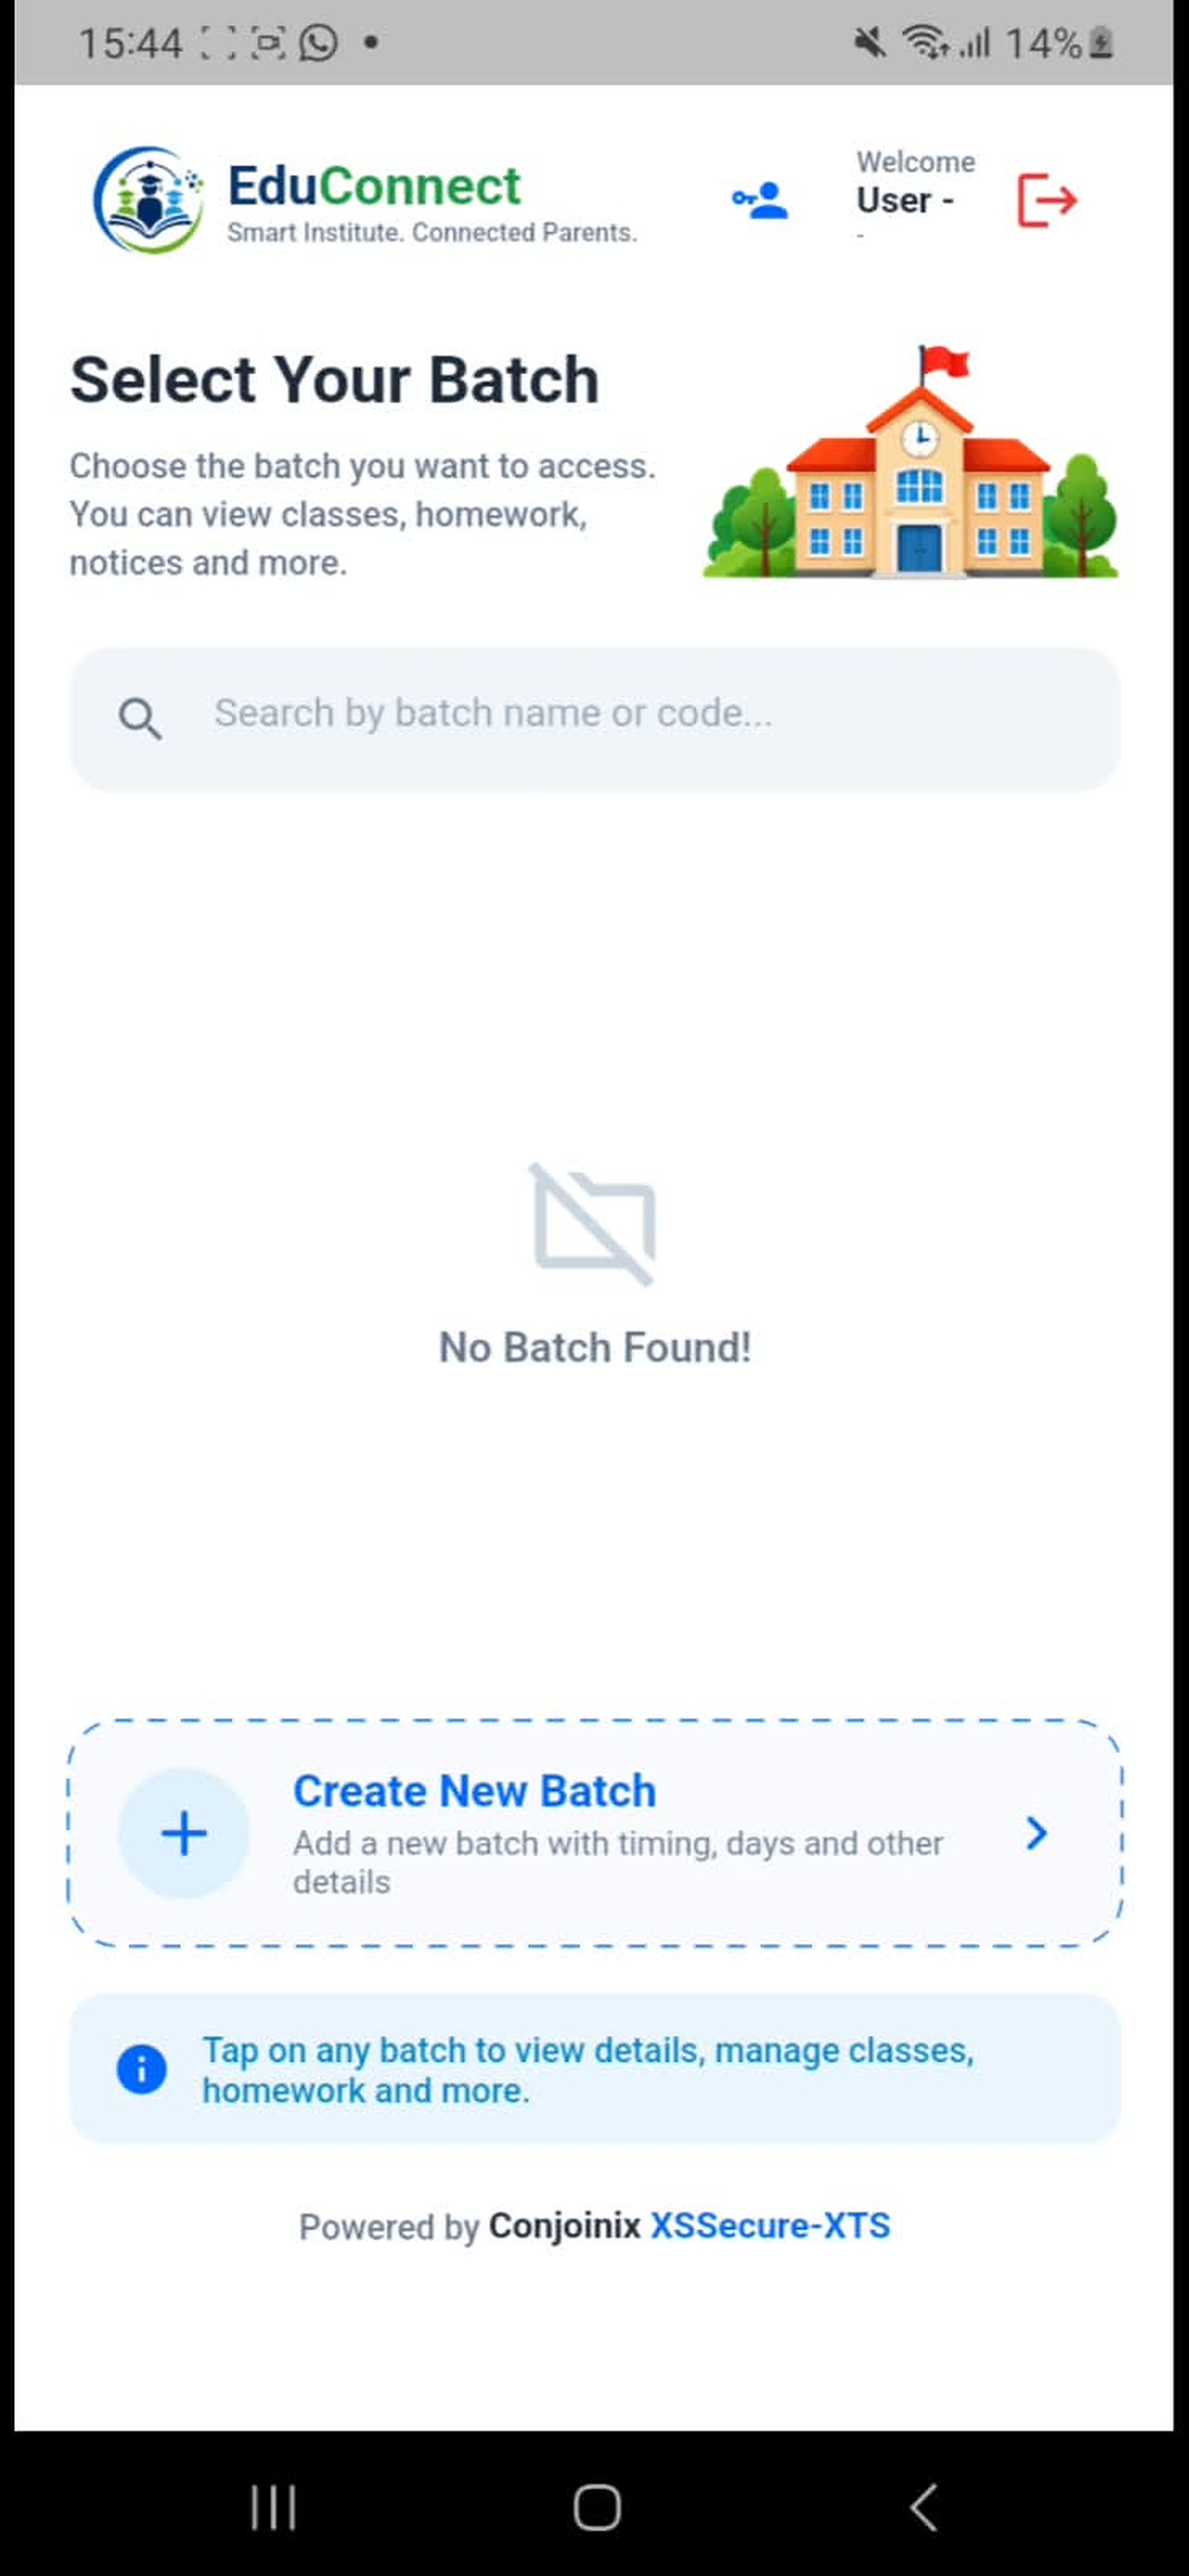
Image 10.jpg   |   Workflow Step 12
EduConnect workflow image 10 - Batch List
13

Create New Batch

Create a new batch by entering its name, description, dates and timings.
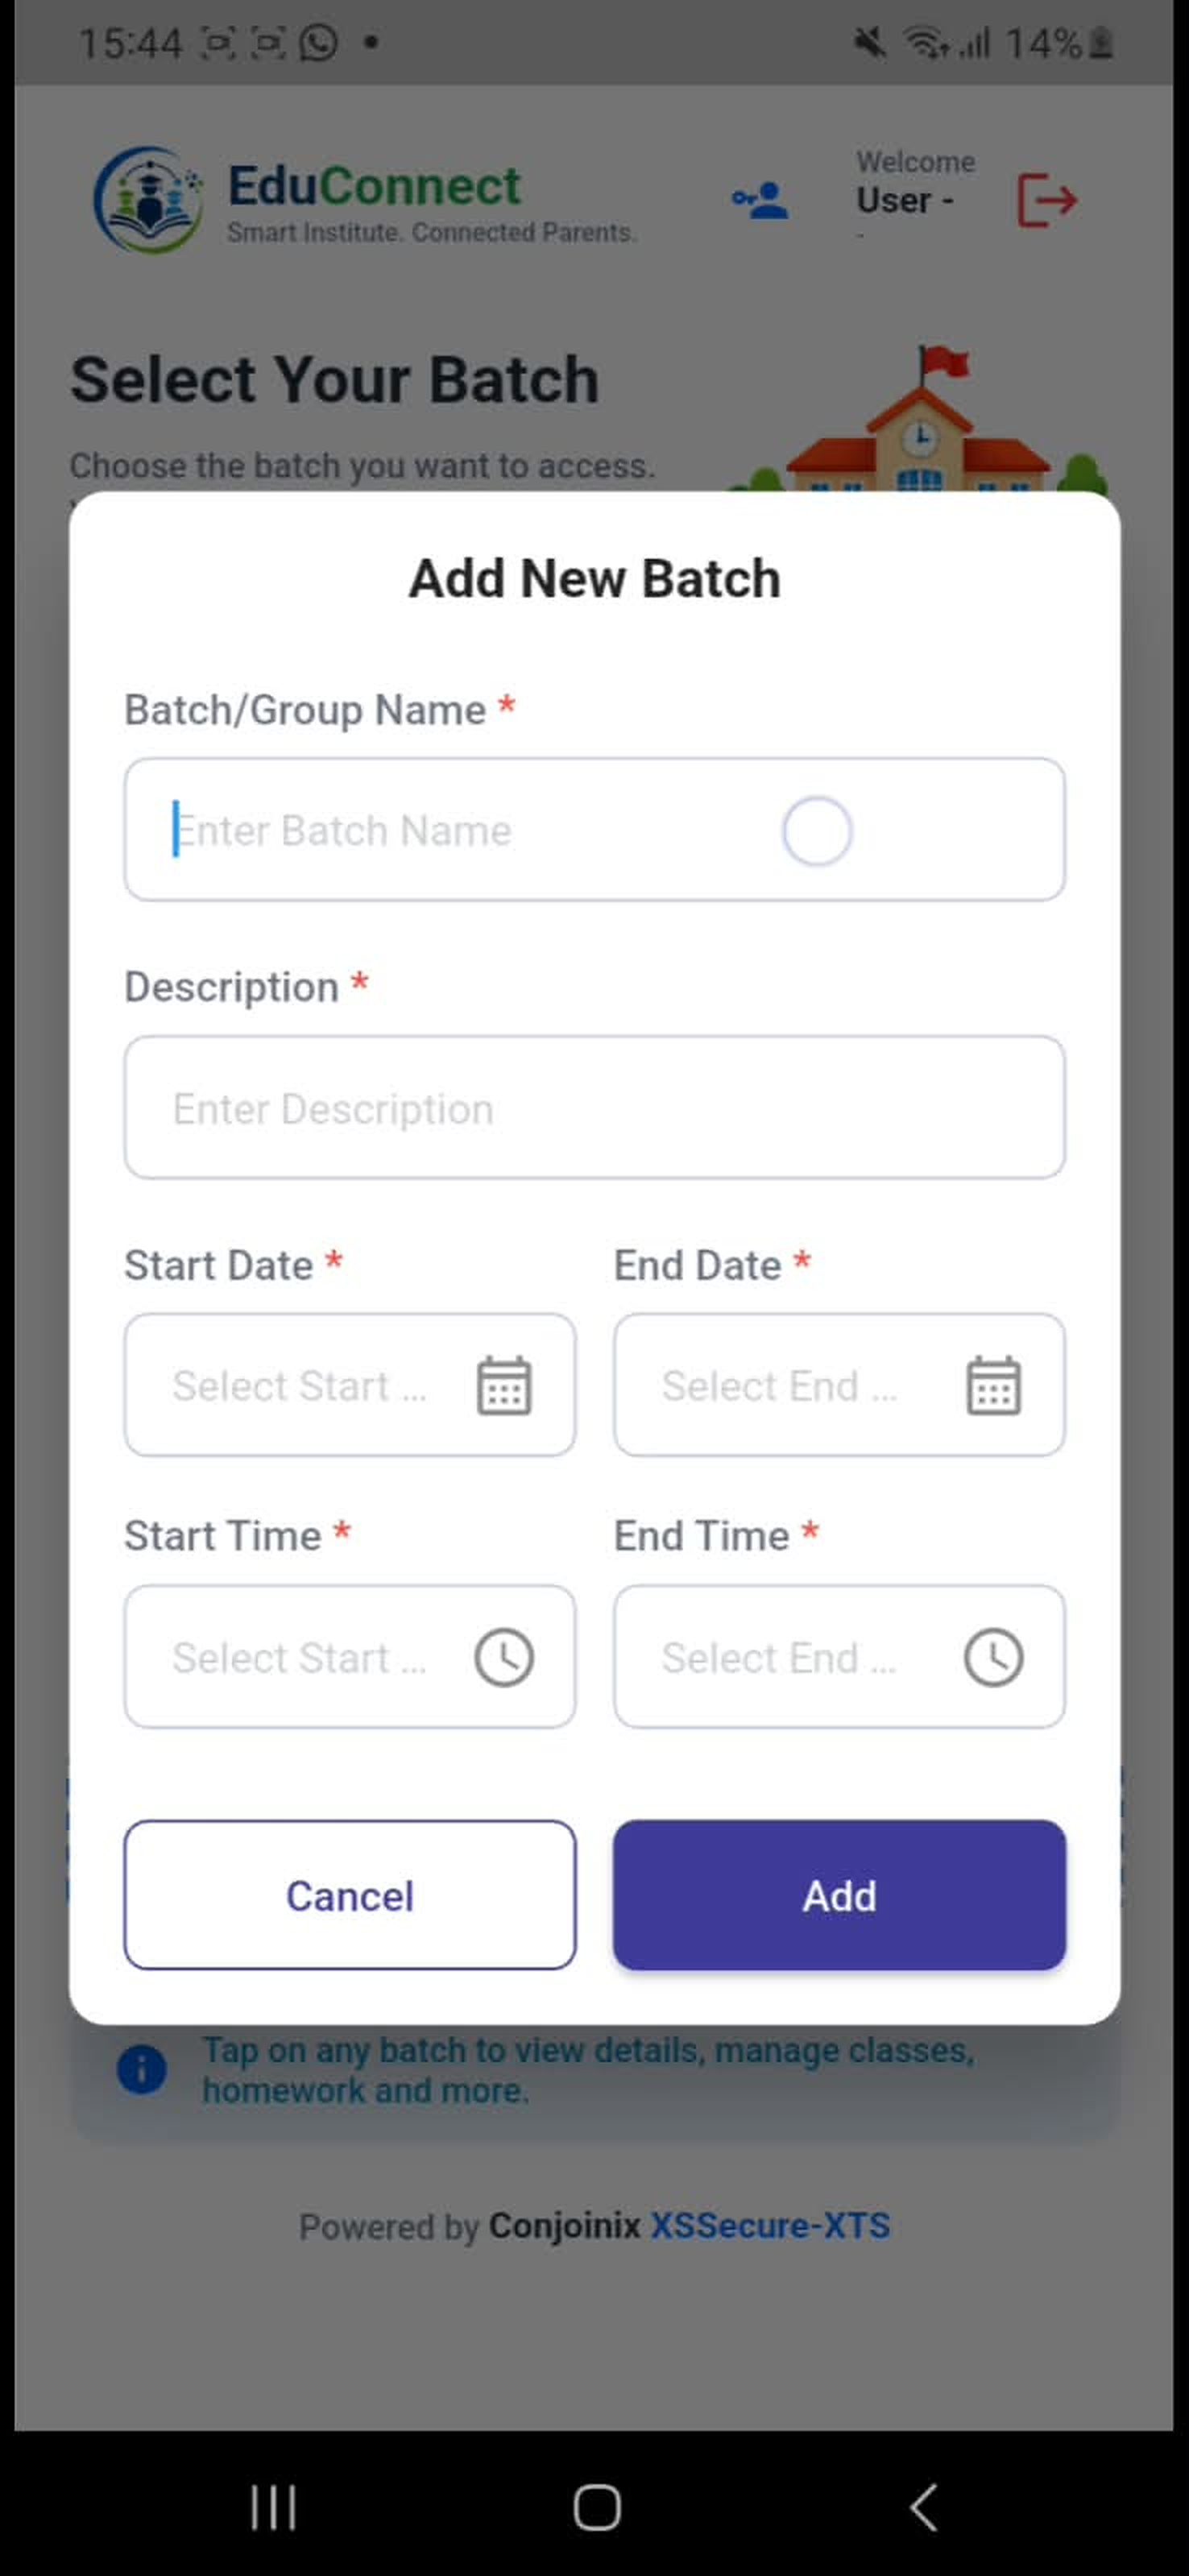
Image 11.jpg   |   Workflow Step 13
EduConnect workflow image 11 - Create New Batch
14

Update Batch Setting

Configure batch settings such as subscription, notifications and attendance.
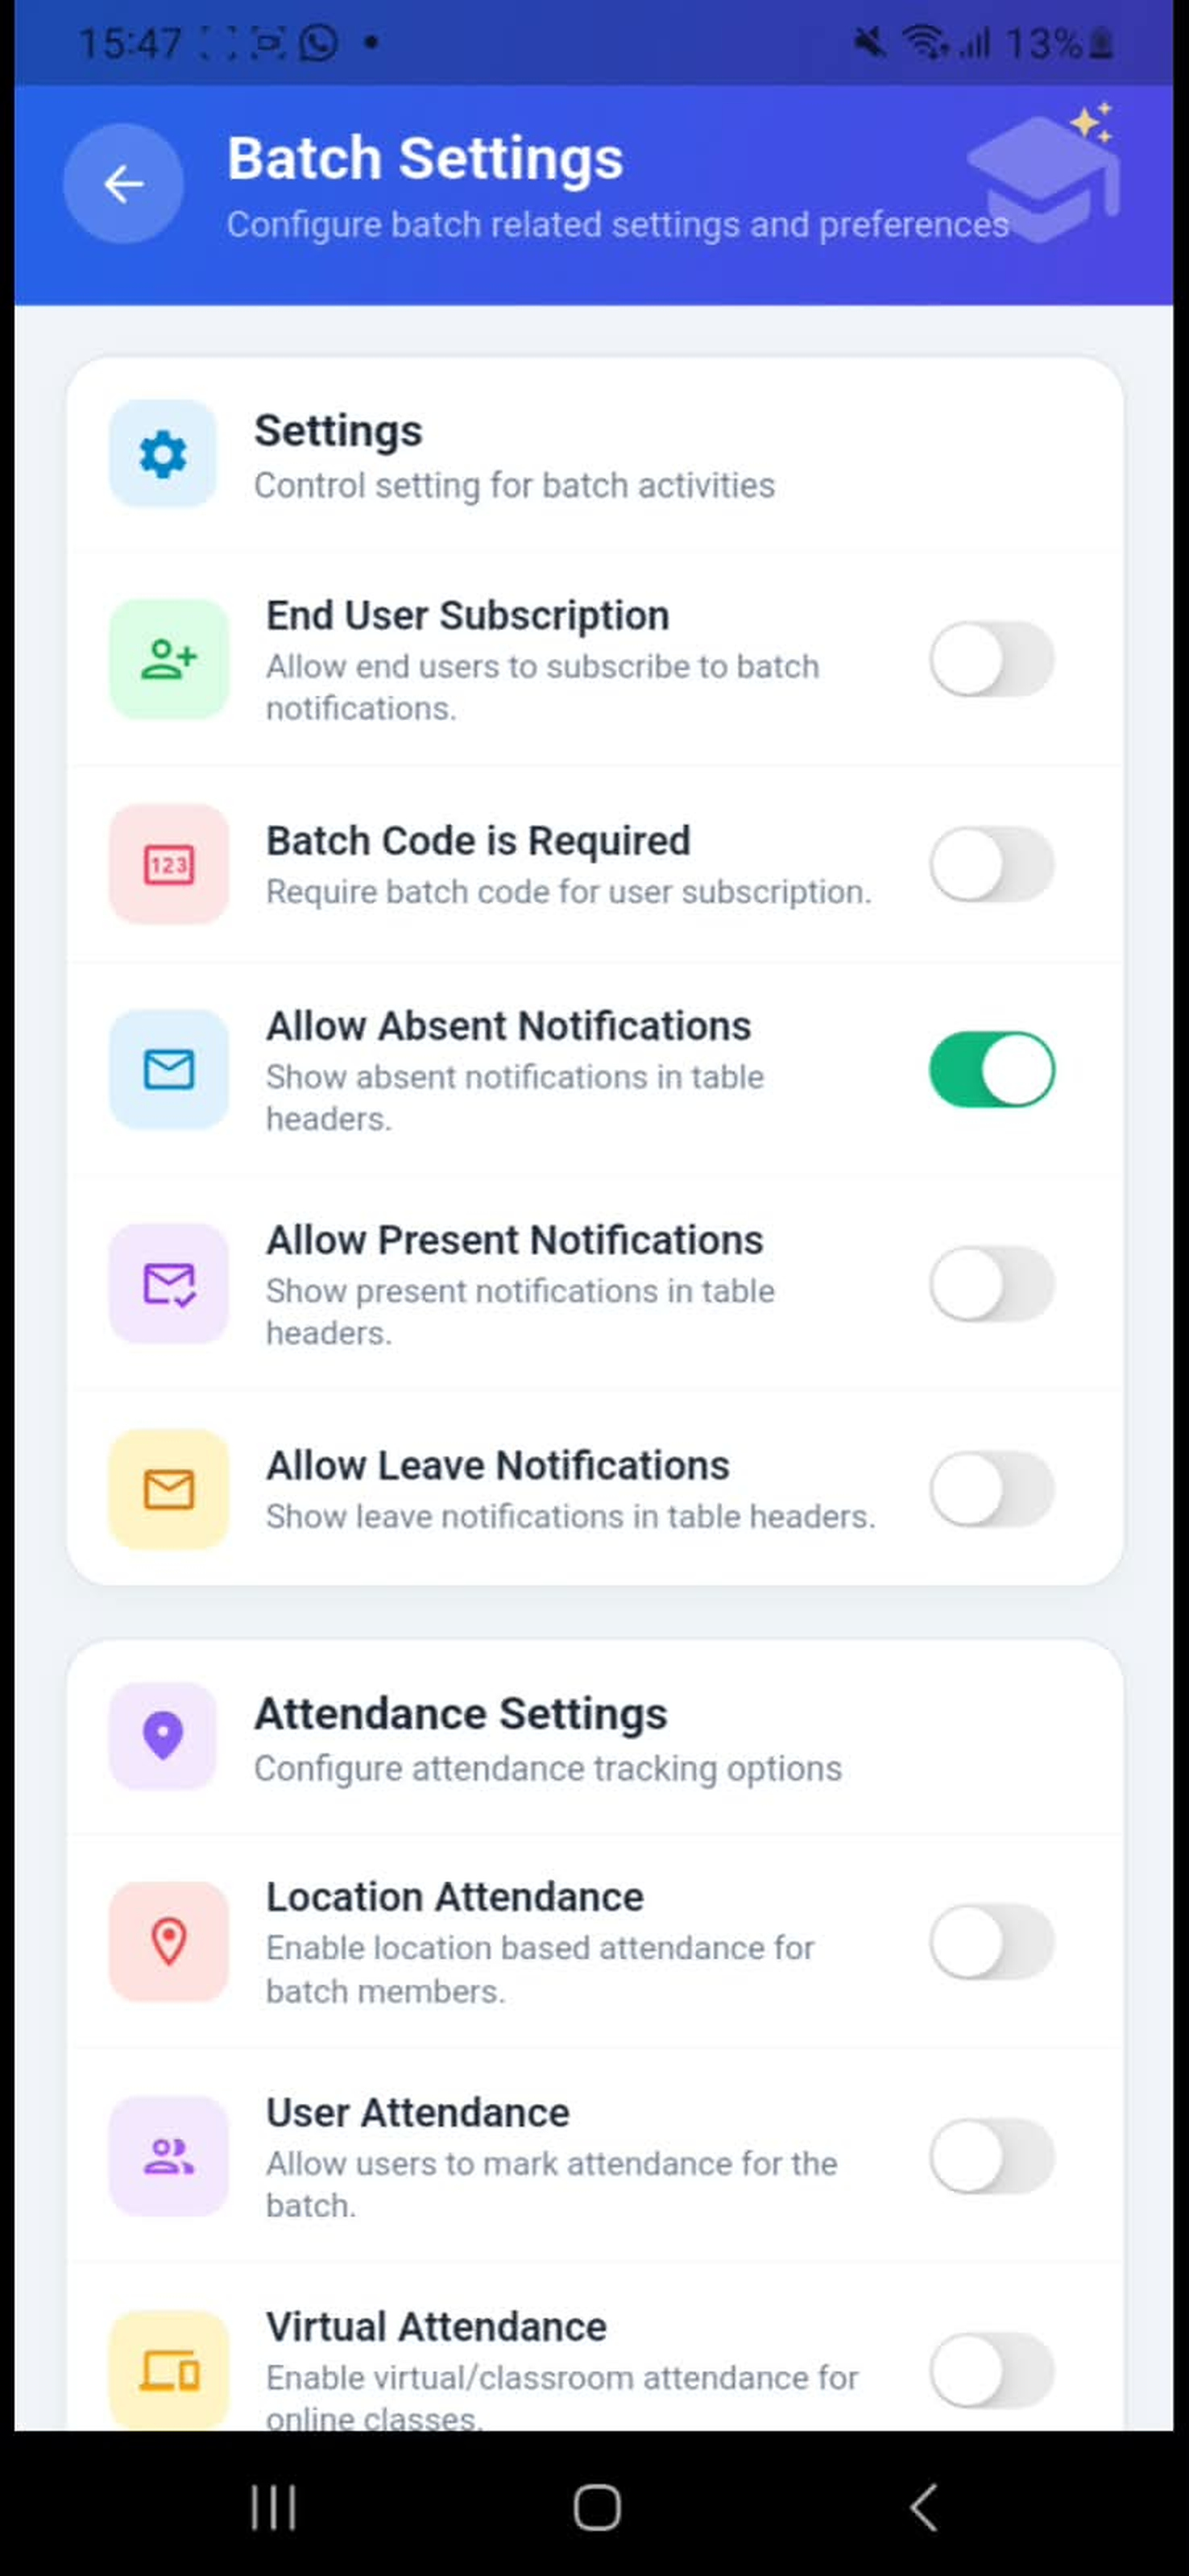
Image 12.jpg   |   Workflow Step 14
EduConnect workflow image 12 - Update Batch Setting
15

Select Your Batch

Select the required batch to access its classes, homework, notices and other features.
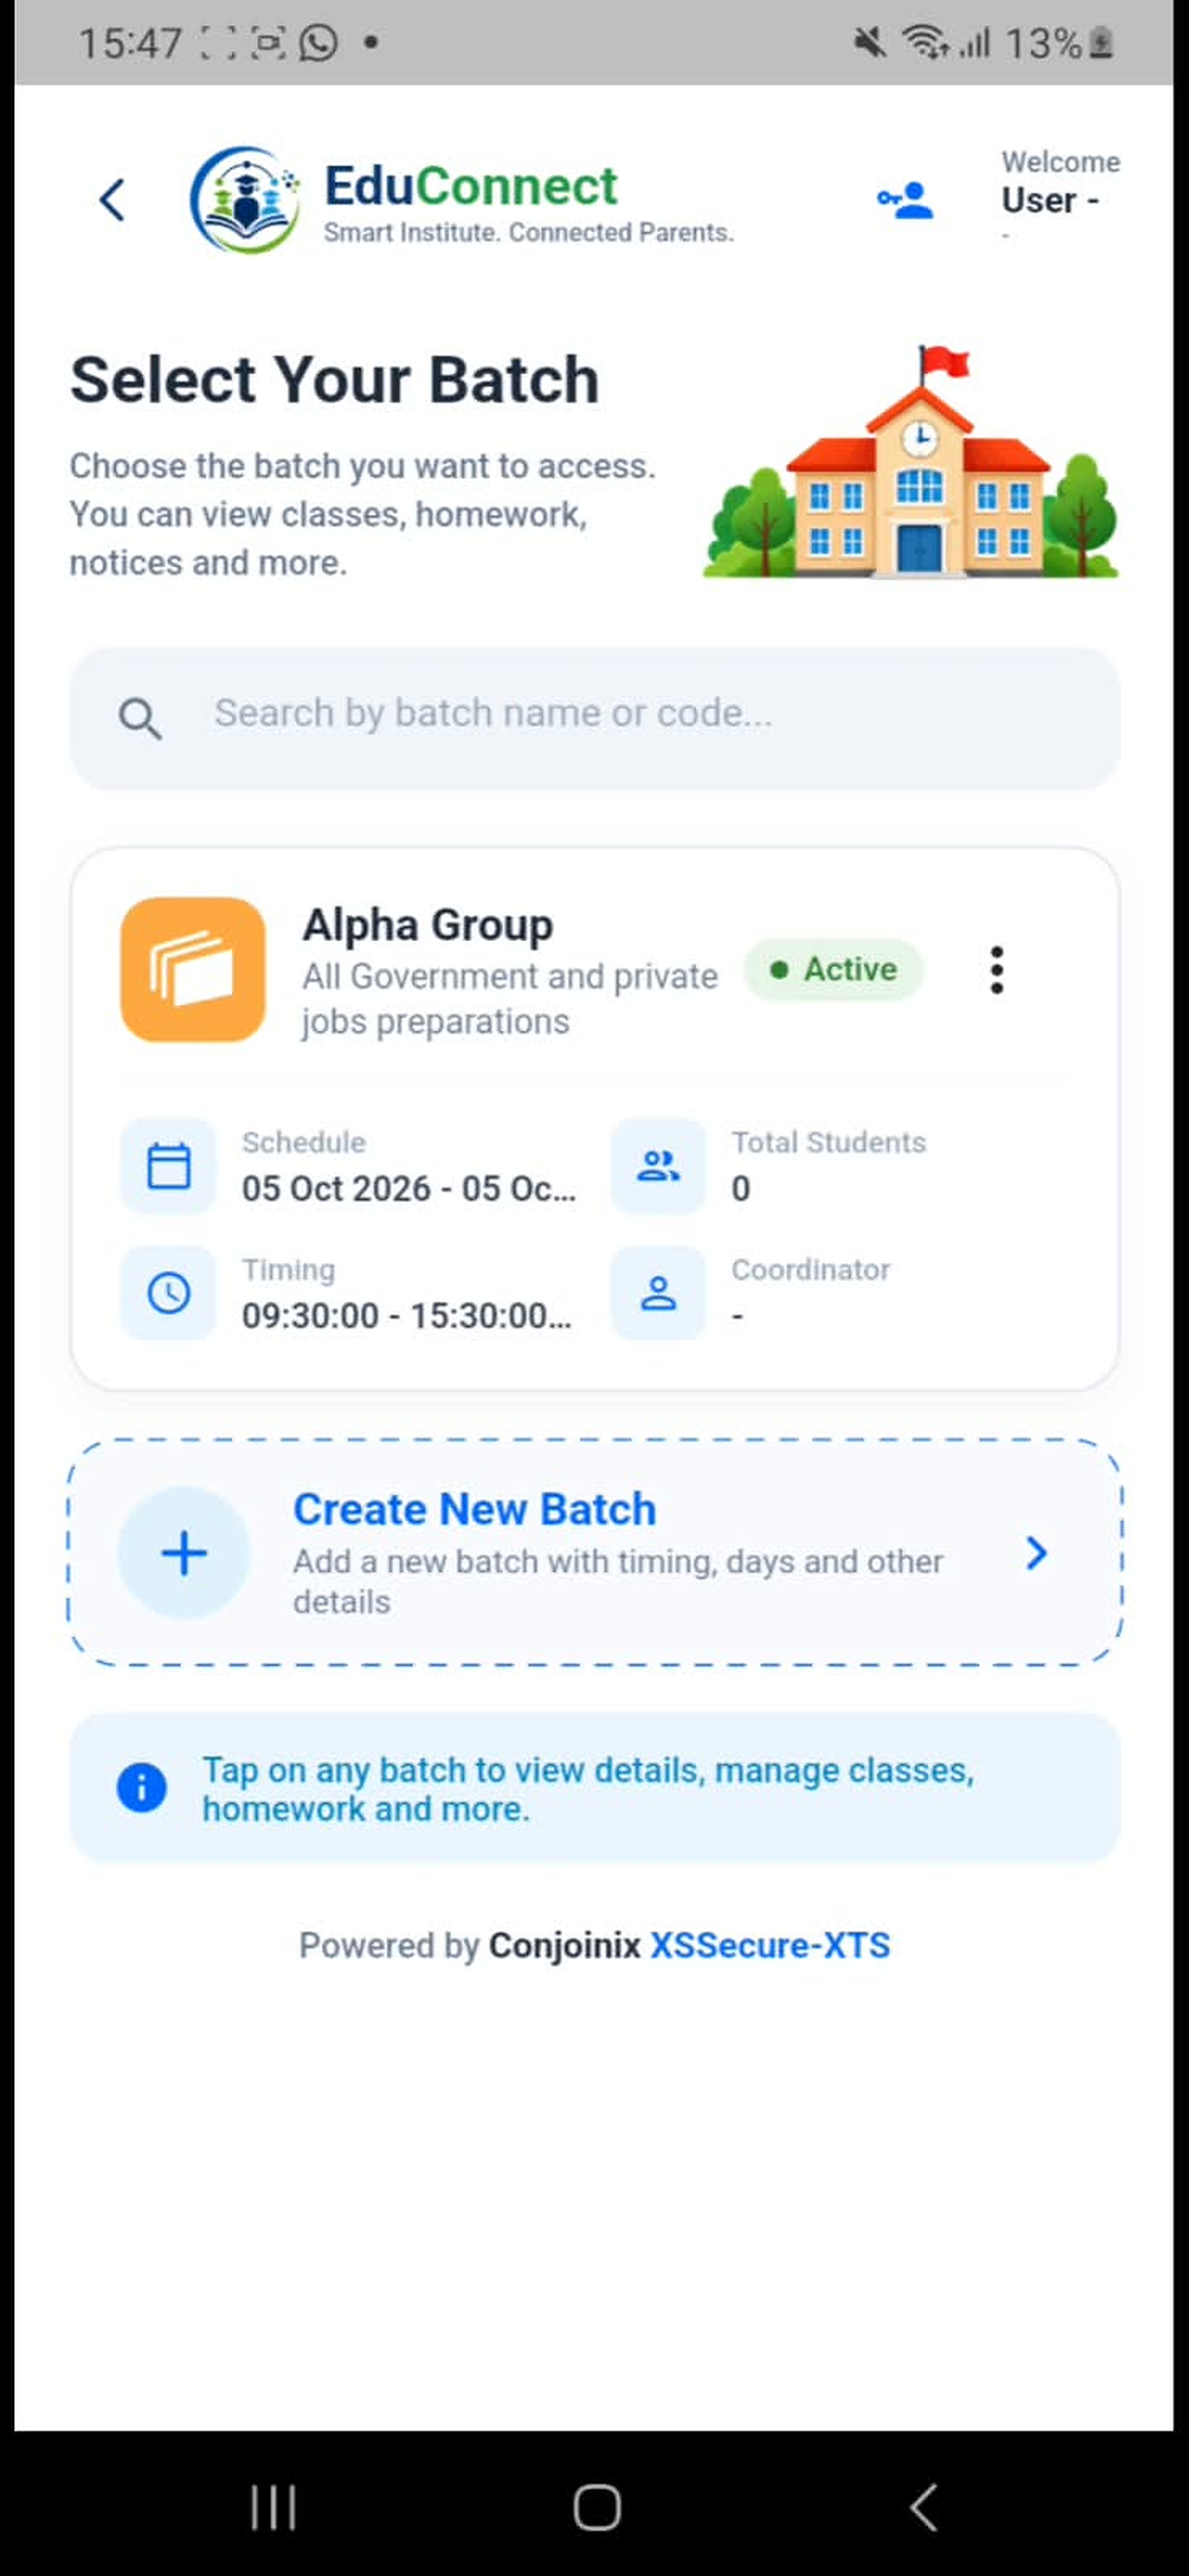
Image 13.jpg   |   Workflow Step 15
EduConnect workflow image 13 - Select Your Batch
16

Batch dashboard

Open the selected batch dashboard with overview statistics and quick actions.
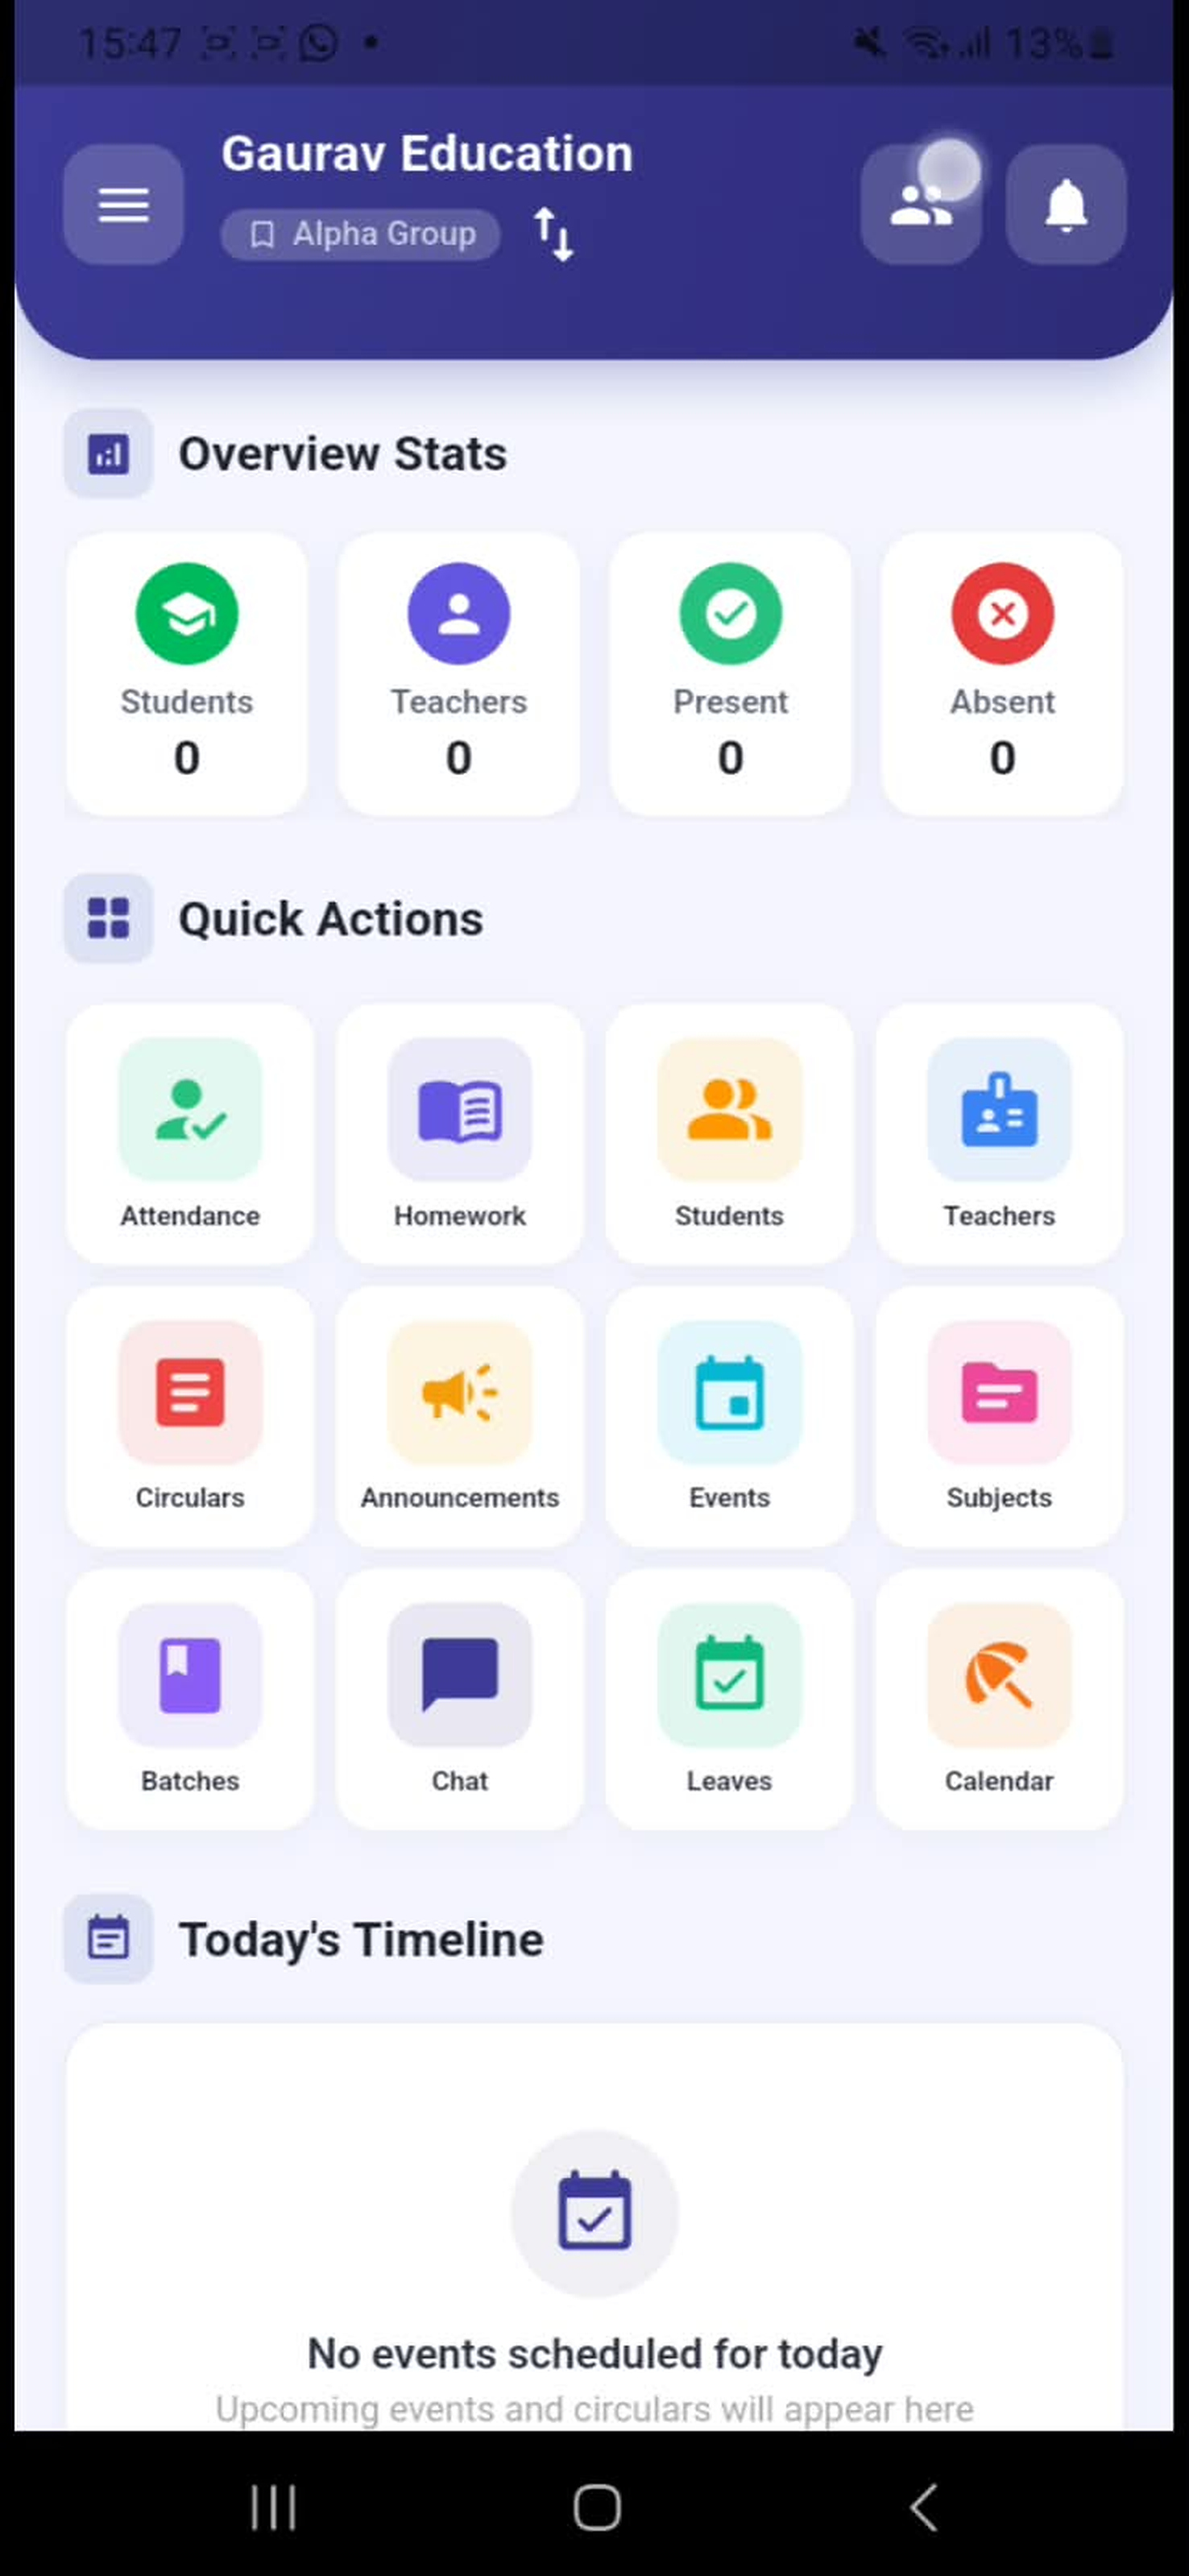
Image 14.jpg   |   Workflow Step 16
EduConnect workflow image 14 - Batch dashboard